
DIY Pallet Bookshelf: Build a Rustic Bookcase From Scrap Wood
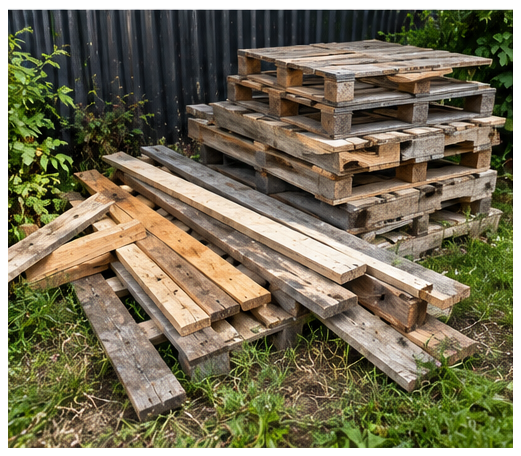
A pile of old pallet wood does not look particularly valuable when it is stacked beside the house. Some boards are weathered, some are crooked, and there always seems to be a ridiculous number of nails hiding exactly where you want to make a cut. But underneath all of that roughness is perfectly usable lumber—and sometimes enough of it to build something you would otherwise have to buy.
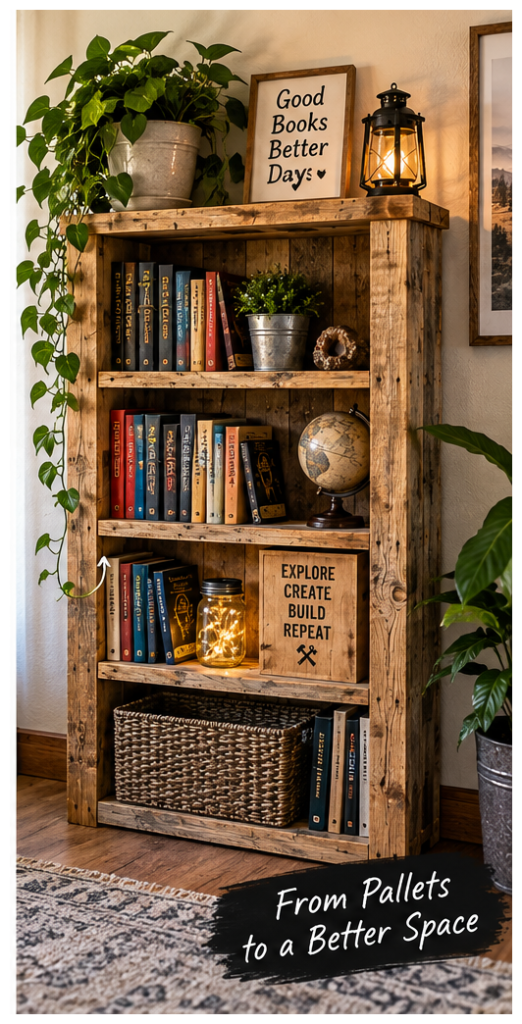
For this project, I’m turning reclaimed pallet boards and scrap lumber into a simple freestanding bookshelf. The goal is not fine furniture or perfect cabinetmaking. This is a practical, beginner-friendly bookcase designed around material that would otherwise sit outside, get burned, or eventually be thrown away.
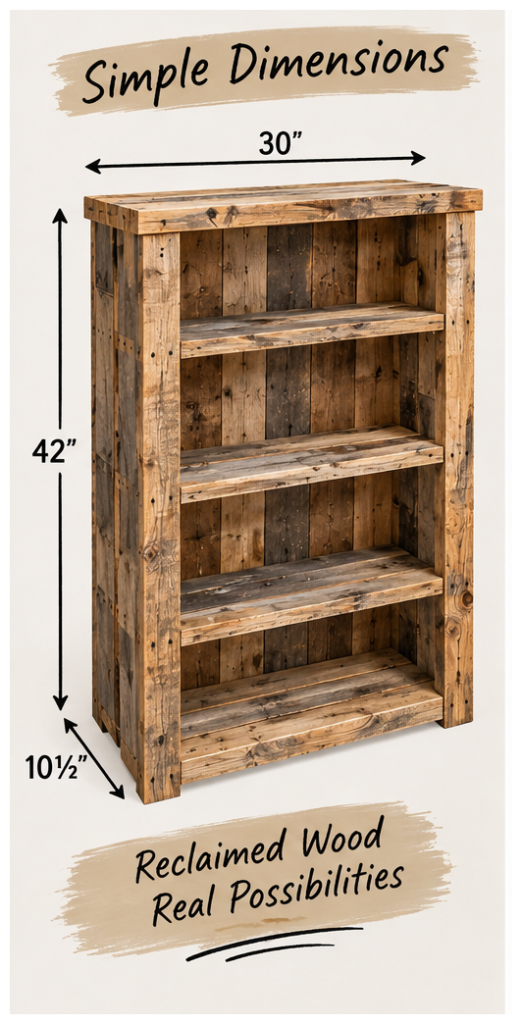
The finished bookshelf is designed to be roughly 30 inches wide, 42 inches tall and about 10½ to 11 inches deep. That makes it large enough to hold a useful amount of books without becoming a major furniture project, and the dimensions work particularly well with common pallet lumber.
Project at a Glance
- Difficulty: Beginner to intermediate
- Build time: Approximately 3–5 hours once the pallet wood is prepared
- Finished size: About 30″ W × 42″ H × 10½–11″ D
- Estimated cost: $0–$20 using reclaimed material
- Main material: Reclaimed pallet wood and scrap plywood
- Tools required: Saw, drill/driver, measuring tape, square and sander
- Best use: Books, workshop storage, office storage or general shelving
The exact dimensions do not have to be followed to the sixteenth of an inch. Pallet lumber varies considerably, even when the pallets themselves use the common North American 48 × 40-inch footprint. The important thing is to establish your overall dimensions first and then make the rest of the project fit the wood you actually have.
The Basic Bookshelf Design
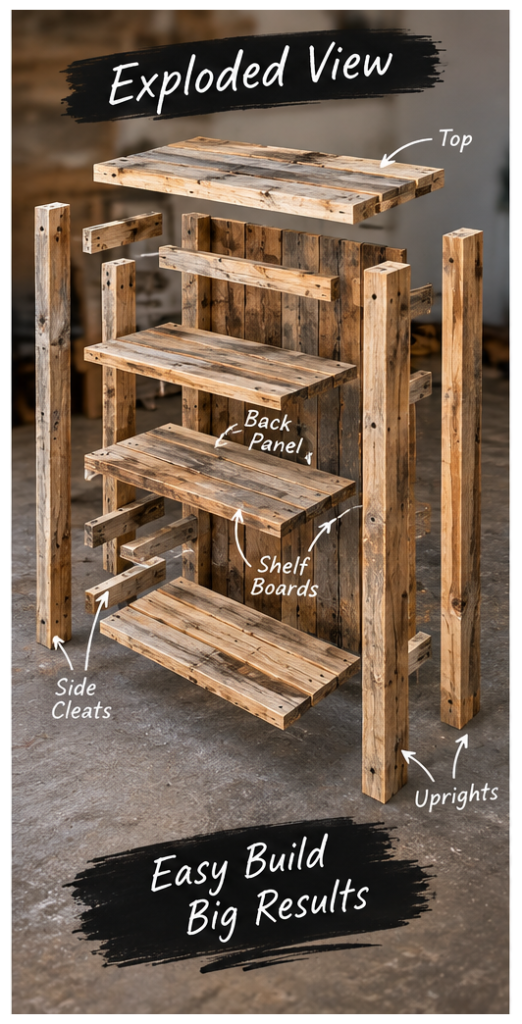
The design is intentionally simple. Four sturdy vertical pieces form the corners of the bookcase, horizontal rails connect them, and reclaimed pallet boards form three shelves plus the top. A plywood back or other rear bracing prevents the bookcase from racking sideways.
The bookshelf will have three main storage levels with approximately 11–12 inches of usable vertical space between them. That is enough for most paperback and hardcover books while keeping the finished unit fairly compact.
The basic target dimensions are:
Overall width: 30 inches
Overall height: 42 inches
Overall depth: approximately 10½–11 inches
Those measurements can be changed fairly easily. If you find especially good 36-inch pallet boards, for example, there is nothing wrong with making a 36-inch-wide bookcase instead.
Materials
The beauty of this project is that the material list is flexible. You do not need twelve identical pieces of expensive dimensional lumber. You need enough straight, structurally sound reclaimed wood to create the frame and shelf surfaces.
For a bookshelf approximately 30 × 42 inches, gather:
- Four sturdy pieces approximately 42 inches long for the corner uprights
- Eight horizontal frame rails approximately 27 inches long
- Enough pallet boards to create four surfaces approximately 30 × 10½ inches
- One piece of scrap plywood for the back, ideally around 30 × 36 inches
- 2½-inch wood screws for structural connections
- 1¼–1½-inch wood screws for shelf boards and backing
- Wood glue, optional
- Sandpaper in approximately 80- and 120-grit
- Wall anti-tip bracket or furniture strap
Because pallet lumber is inconsistent, consider these quantities a target rather than a rigid shopping list. If your boards are particularly wide, you may need fewer pieces. If they are narrow, simply use more boards beside one another.
Tools
You do not need a fully equipped woodworking shop for this build. A circular saw will do most of the cutting, although a miter saw makes repeated cuts easier.
Useful tools include:
- Circular saw or miter saw
- Drill/driver
- Tape measure
- Speed square or carpenter’s square
- Orbital sander or sanding block
- Pry bar
- Hammer or nail puller
- Clamps
- Pencil
- Eye and hearing protection
A reciprocating saw with a demolition blade can also make pallet disassembly much faster, especially when stubborn nails would otherwise split the boards.
Before Using Pallet Wood Indoors
This part matters. Just because a board is free does not automatically make it suitable for indoor furniture.
Inspect the pallets for oil, paint, chemicals, mold, rot or anything else you would not want brought inside your home. International shipping pallets may have treatment markings stamped on them. HT generally indicates heat treatment, while pallets marked MB indicate methyl bromide fumigation and are not something I would choose for an indoor woodworking project.
If the origin of a pallet is completely unknown and the wood is visibly contaminated, skip it. There is too much free pallet wood available to justify gambling on questionable material.
You also need to remove every nail, staple and piece of metal you can find before cutting. One missed nail can instantly ruin a saw blade and create a dangerous surprise.
Step 1: Sort the Pallet Lumber
Do not immediately start cutting the first boards you pick up. Spend ten minutes sorting them.
Create three rough piles. Put your straightest and best-looking lumber in one pile for visible shelf surfaces. Put strong but ugly boards in another pile for rails and structural parts. Anything badly cracked, rotten, twisted or contaminated goes into the reject pile.
This little bit of sorting makes a huge difference to the finished project. Rustic does not have to mean sloppy.
Step 2: Cut the Four Uprights
Choose four of your strongest straight pieces and cut them to 42 inches.
These become the four corners of the bookshelf. Lay them beside one another after cutting and make sure they are reasonably close in length. If one is slightly longer, trim them together so the bookcase does not wobble.
Lightly sand the faces and especially the edges where people are likely to touch the bookshelf. There is no need to erase every mark or nail hole—the reclaimed character is part of the appeal.
Step 3: Determine the Rail Length
For a bookshelf with an outside width of 30 inches, the horizontal rails fit between the left and right uprights.
If your uprights are approximately 1½ inches thick, the calculation is:
30″ – 1½” – 1½” = 27″
That gives you a rail length of approximately 27 inches.
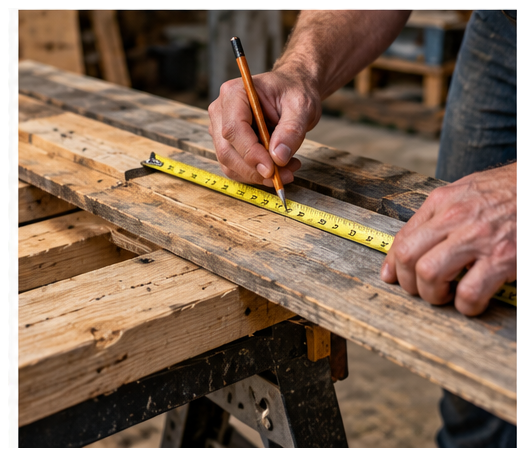
Because pallet lumber varies, measure your actual uprights before cutting all eight rails. Once you have confirmed the first one fits properly, use it as the template for the remaining pieces.
You will need a front and rear rail at each shelf level. These rails form the structure that supports the shelf boards.
Step 4: Assemble the Main Frame
Lay two uprights on a flat surface and position the horizontal rails between them.
For a 42-inch-tall bookshelf, a useful starting layout is to position the shelf surfaces at approximately:
4 inches from the floor
17 inches from the floor
30 inches from the floor
42 inches at the top
This gives you three generous book compartments.
Predrill the reclaimed lumber before driving screws near the ends. Old pallet wood can split surprisingly easily, and drilling a pilot hole takes only a few seconds.
Fasten the rails to the uprights using approximately 2½-inch wood screws. Build the front frame and rear frame, then connect them while carefully checking that the bookshelf remains square.
A carpenter’s square helps, but you can also measure diagonally from corner to corner. When the two diagonal measurements match, the frame is square.
Step 5: Build the Shelf Surfaces
The shelf boards can be arranged several ways, but one of the easiest methods with pallet scraps is to run short boards from the front rail to the rear rail.
Cut the shelf pieces to approximately 10½ inches, or whatever the actual depth of your frame requires.
Lay them side by side across each set of rails. Leave only a small gap between boards—roughly 1/8 inch is plenty if you want to retain the pallet-board appearance.
Fasten each piece into the front and rear support rails with 1¼- to 1½-inch screws.
The result should be a sturdy slatted shelf capable of supporting books without relying on screws driven into weak end grain.
Step 6: Add the Top
The top can be made exactly the same way as the shelves, or you can choose your nicest pieces of reclaimed wood and make it slightly more decorative.
A small overhang of approximately ½ inch at the front and sides can make the bookshelf look more finished without complicating the build.
Dry-fit the top boards first, adjust the spacing until you like the appearance, and then screw them into the upper frame.
Step 7: Add a Back
A bookshelf without rear bracing can lean sideways or gradually work itself out of square. Adding a back solves that problem and makes the entire unit feel dramatically more solid.
Since I already have scrap plywood available, that is what I would use here. Cut the plywood to fit the rear of the bookshelf and fasten it into the uprights and horizontal rails using short screws.
The backing does not necessarily have to cover every inch. Even a partial plywood panel can provide significant resistance to racking.
If you do not have plywood, pallet boards can also be used as rear braces. A diagonal brace is particularly effective because it prevents the rectangular frame from shifting into a parallelogram.
Step 8: Sand the Bookshelf
Pallet lumber can be extremely rough, and bookshelves are furniture that people will regularly touch.
Start with approximately 80-grit sandpaper to remove splinters, raised grain and particularly rough areas. Follow with 120-grit for the visible and frequently touched surfaces.
You do not need to sand the wood until it looks new. In fact, keeping some weathering, saw marks, nail holes and colour variation is what gives reclaimed lumber its character.
Pay extra attention to corners and shelf edges. Those are the places most likely to catch clothing, hands or book covers.
Step 9: Finish It—or Leave It Rustic
You can leave the bookcase unfinished if you like the raw pallet appearance, although I would still thoroughly clean and sand it before bringing it indoors.
A clear matte polyurethane preserves the reclaimed appearance while making the surface easier to clean. Danish oil or another penetrating wood finish can deepen the wood colour considerably. Paint is another option if the boards vary too much in appearance for your liking.
If you want the bookcase to retain its reclaimed look, my preference would be a simple clear matte or satin finish.
Let everything dry and cure according to the finish manufacturer’s instructions before filling the shelves with books.
Do Not Skip the Anti-Tip Strap
A narrow bookcase loaded with books becomes surprisingly heavy.
Attach the finished unit to a wall stud using a proper furniture anti-tip strap or bracket. This is particularly important in a home with children or pets.
It takes only a few minutes and is one of those small details that turns a casual scrap-wood project into responsible furniture.
What Makes This a Good Beginner Pallet Project?
Pallet wood projects sometimes become unnecessarily complicated. People try to turn mismatched reclaimed lumber into precision cabinetry and end up fighting the material the entire way.
This bookshelf does the opposite. Slight colour variation looks good. Nail holes look appropriate. Minor differences between shelf boards disappear once books are sitting on them.
At the same time, the project still teaches several useful woodworking skills: selecting lumber, removing nails, measuring accurately, making repeatable cuts, drilling pilot holes, checking for square, building a rigid frame and applying a finish.
That is exactly what I want from a good small DIY project. You end up with something genuinely useful while learning techniques that transfer directly into larger builds.
Easy Ways to Customize the Design
Once you understand the basic frame, there are dozens of ways to modify it.
You could make the bookshelf 36 inches wide for more storage, shorten it into a two-shelf unit, add decorative side boards, install a solid wood top, paint only the frame while leaving the shelves natural, add small feet, or build two matching units.
You could even use the same construction method to build garage shelving, a shoe rack, pantry storage or a small workshop cabinet.
The basic idea remains the same: four uprights, horizontal supports, shelf surfaces and enough rear bracing to keep everything square.
How Many Pallets Do You Need?
For this 30-inch-wide bookshelf, I would collect about three standard 48 × 40-inch pallets before starting. You may be able to build it from two especially good pallets, but reclaimed wood is unpredictable, and some boards will inevitably be cracked, twisted, stained or damaged during disassembly.
Having a third pallet gives you enough material to be selective rather than forcing a questionable board into the project. The thicker pallet stringers are particularly useful for the bookshelf frame, while the thinner deck boards work well for shelves, backing and trim.
If you already have miscellaneous scrap lumber or plywood available, you may need even less pallet material. The goal is not to use every piece of one pallet—it is to select the best pieces from the material you have.
That paragraph adds real search value because “how many pallets” is exactly the sort of practical question generic DIY articles often skip.
2. Add a proper cut-list table
I think this is probably the biggest thing missing right now.
Put something like this near the materials section:
| Part | Quantity | Approx. Size |
|---|---|---|
| Vertical uprights | 4 | 42″ long |
| Front/rear shelf rails | 8 | Approx. 27″ long |
| Shelf boards | 12 | Approx. 10½” long* |
| Top boards | 3 | Approx. 30″ long* |
| Back panel | 1 | Cut to fit |
| Optional rear braces | 1–2 | Cut to fit |
*Adjust the number and width of shelf boards to match the pallet lumber you actually have.
Then add:
Important: Pallet lumber is not dimensionally consistent. Measure your actual boards before making repetitive cuts. Use the dimensions above as the design target rather than assuming every reclaimed board will match nominal lumber sizes.
That makes the plans much more usable.
3. Add “The Easiest Way to Take Apart a Pallet”
This fits the project perfectly and gives the page another reason to exist.
How to Take Apart a Pallet Without Destroying the Boards
Pallet disassembly can take longer than building the bookshelf if you approach it the wrong way. Trying to force every board off with a pry bar often splits the ends around the nails, especially on dry or weathered pallets.
A pry bar and hammer work well when the boards release easily, but stubborn pallets can often be dismantled faster with a reciprocating saw. Slide a demolition or metal-cutting blade between the deck board and stringer and cut through the nails rather than trying to pull every nail through the wood.
Once the boards are separated, inspect them carefully and remove or cut off any remaining metal before using a circular saw or miter saw. Running a saw blade into a hidden pallet nail is a great way to ruin a blade—and possibly your afternoon.
That’s useful, personal-sounding content.
4. Add a “Mistakes I Would Avoid” box
This would make FinklerDIY feel more experienced and less like instructions copied out of a manual.
Five Mistakes to Avoid
- Using the first pallet boards you find. Sort first and save your straightest material for visible pieces.
- Skipping pilot holes. Dry reclaimed lumber splits easily near board ends.
- Building without checking for square. Small errors become very obvious once shelves and backing are installed.
- Leaving sharp pallet edges untouched. Rustic furniture should look rough—not feel rough.
- Skipping the back or diagonal bracing. Rear bracing is what stops a tall rectangular frame from racking sideways.
That section would be worth reading even for somebody who already understands the basic construction.
5. The biggest upgrade: add a free printable plan
This is the one I’d absolutely do.
Right near the beginning of the page, eventually put a button:
Download the Free Pallet Bookshelf Plan
And make it a simple 2–3 page PDF containing:
- Finished dimensions
- Front and side elevation
- Exploded assembly drawing
- Cut list
- Materials list
- Basic assembly order
You already have most of that information. We could make the PDF later without creating much extra work.
That turns your article into something people may bookmark, download, share, or return to rather than read once and leave.
And there’s one more thing that will eventually make this page considerably better than anything we can add tonight:
Final Thoughts
One of the most satisfying things about working with reclaimed lumber is watching material that looked almost worthless become something useful.
A pile of old pallet boards may never have the perfectly uniform appearance of lumber from a store, but that is not necessarily a disadvantage. Every stain, nail hole and weathered section tells you where the material came from.
This 30-inch-wide pallet bookshelf is deliberately simple enough for a newer DIYer while still producing a useful piece of furniture. More importantly, it is the sort of project that can be built largely from material you may already have sitting around.
If you have a stack of unused pallets taking up space, this is a pretty good reason to finally start pulling them apart.