
DIY Rustic Driveway Gate With a Separate Pedestrian Entrance
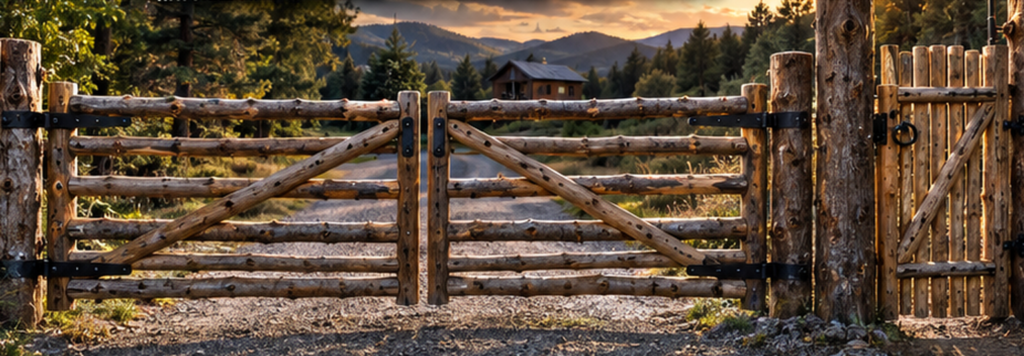
A pile of straight poles can suggest all kinds of projects, but a rustic entrance is particularly appealing. Instead of buying an ordinary gate, you could turn some of that wood into something that belongs to the property: natural timber, visible grain, sturdy hardware and a matching fence. The challenge is making an entrance that works as well as it looks.
A driveway gate is not simply a fence panel with hinges attached. It needs to swing through its entire opening, stay aligned with its latch and remain manageable when someone opens it by hand. The wood provides the character, but the frame, connections, hardware and post installation determine whether the entrance becomes useful or frustrating.
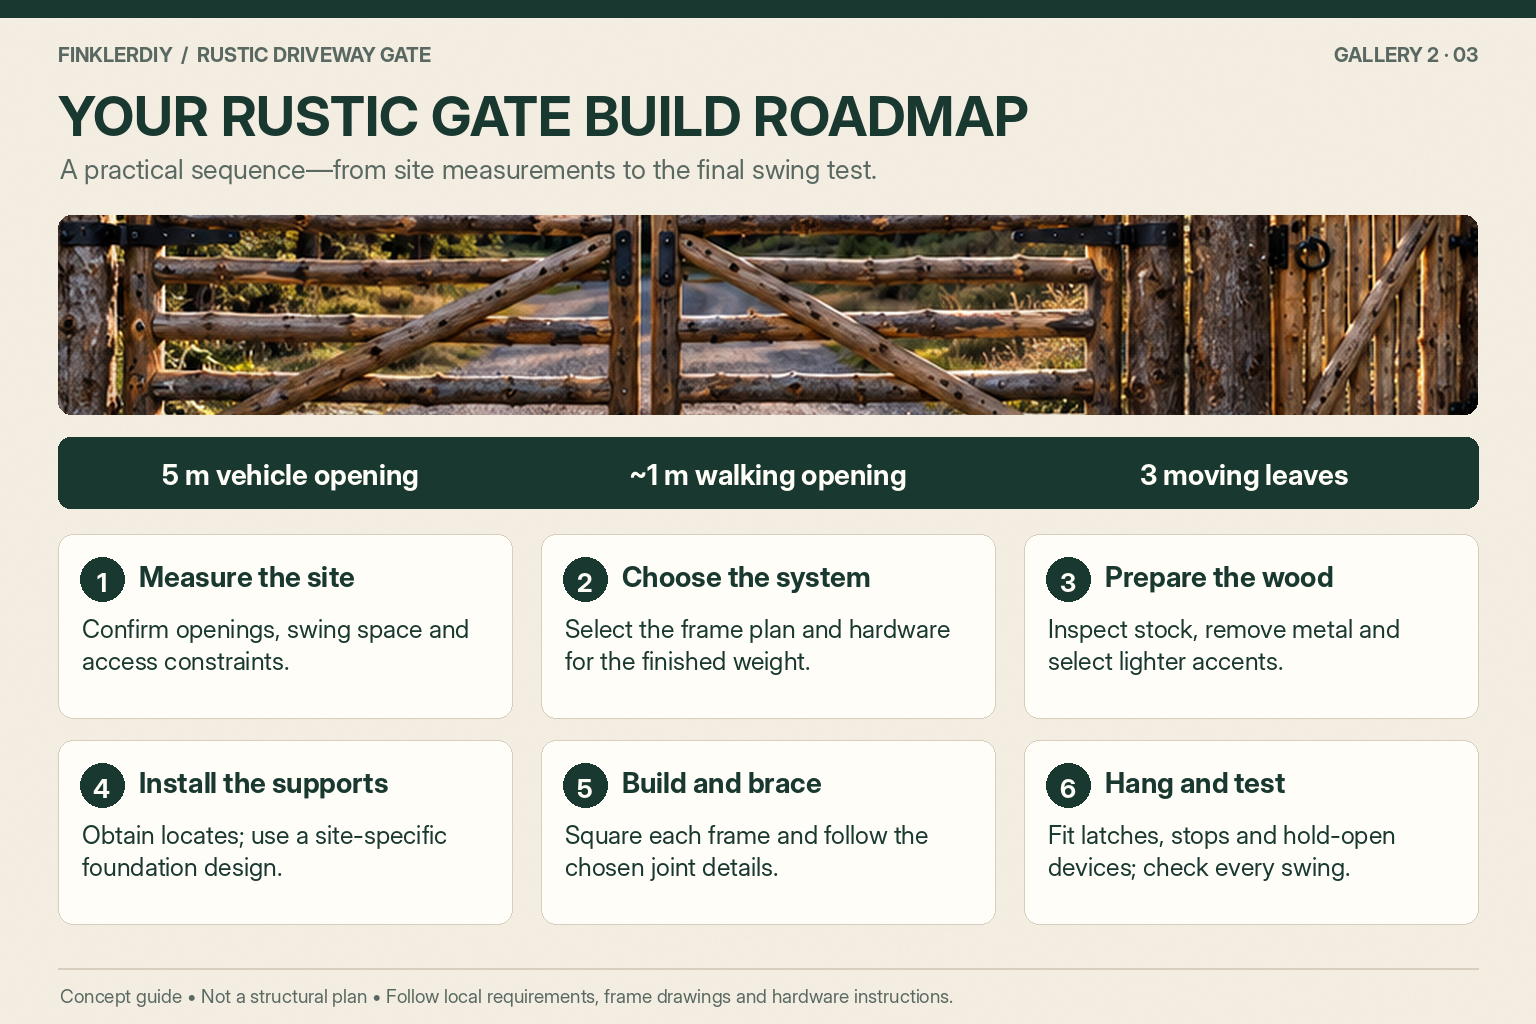
This project explores a five-metre vehicle opening with two swinging gate leaves, plus a separate pedestrian gate beside it. The proposed construction combines a properly designed timber frame with selected reclaimed-wood details and matching pole fencing. It is a build-and-layout guide rather than a load-rated plan for unidentified logs: final frame specifications, hinge selection and foundations must match the actual materials and installation.
The Design: Two Vehicle Gates and One Walking Gate
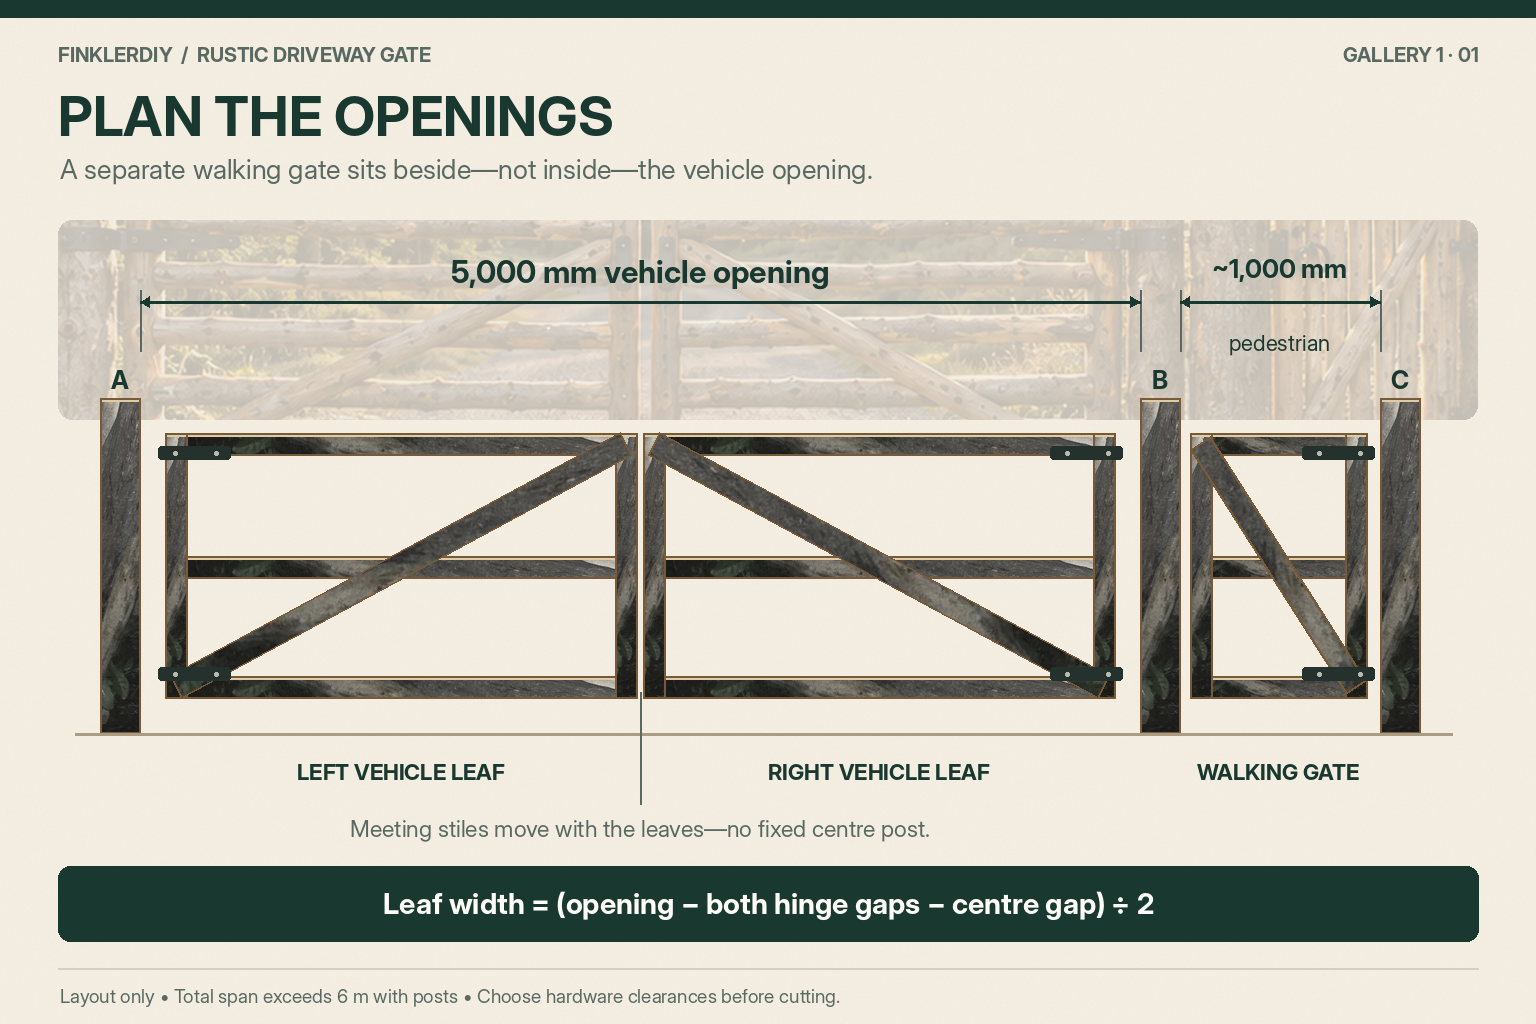
The proposed entrance has three moving sections: two large leaves that meet across the driveway and a smaller gate alongside them. There is no permanent centre post blocking the vehicle opening. Opening both driveway leaves provides access for vehicles, while the pedestrian gate allows everyday passage without moving either large leaf.
For this layout, five metres means the clear distance between the main driveway posts, not the total width of the entrance. The pedestrian opening adds approximately another metre, and the posts add their own widths. Before ordering anything, distinguish between the opening you need for vehicles and the overall space available.
| Component | Starting design target |
|---|---|
| Vehicle opening | 5,000 mm between the main posts |
| Vehicle gates | Two equal, oppositely hinged leaves |
| Individual leaf width | Calculated after choosing hardware |
| Pedestrian opening | Approximately 1,000 mm between posts |
| Gate height | Approximately 1,200 mm, subject to local requirements |
| Operation | Manual, with latches and hold-open devices |
| Appearance | Open timber frames with restrained rustic detailing |
A three-post arrangement can work conceptually: the left post supports the left vehicle leaf, the middle post supports the right vehicle leaf and receives the pedestrian latch, and the outer post supports the pedestrian gate. This keeps the pedestrian hinge load off the middle post, although that post still needs to accommodate the complete installation. If the site or foundation design calls for independent posts, allow additional space rather than forcing everything into the smallest possible footprint.
Why Not Build One Five-Metre Gate?
One enormous leaf sounds simpler until you consider the distance its free end travels and the leverage it applies to its support. Dividing the entrance creates two shorter leaves and gives more flexibility when opening only part of the driveway. The tradeoff is an additional hinge assembly and the need to align two meeting edges.
There is also a practical distinction between a pedestrian entrance beside the gate and a small door built inside it. An integrated door interrupts the larger frame and may introduce a threshold to step over. For this first version, a separate walking gate preserves uninterrupted vehicle-gate frames and keeps everyday access straightforward.
Step 1: Check the Site Before Choosing the Wood
Start by marking the proposed gate line and walking through how the entrance will operate. Check the property boundary, road allowance, driveway approach, drainage, overhead obstructions and the space where each leaf will rest when open. Ask the local authority about applicable fence-height, sightline, access and setback requirements before committing to the location.
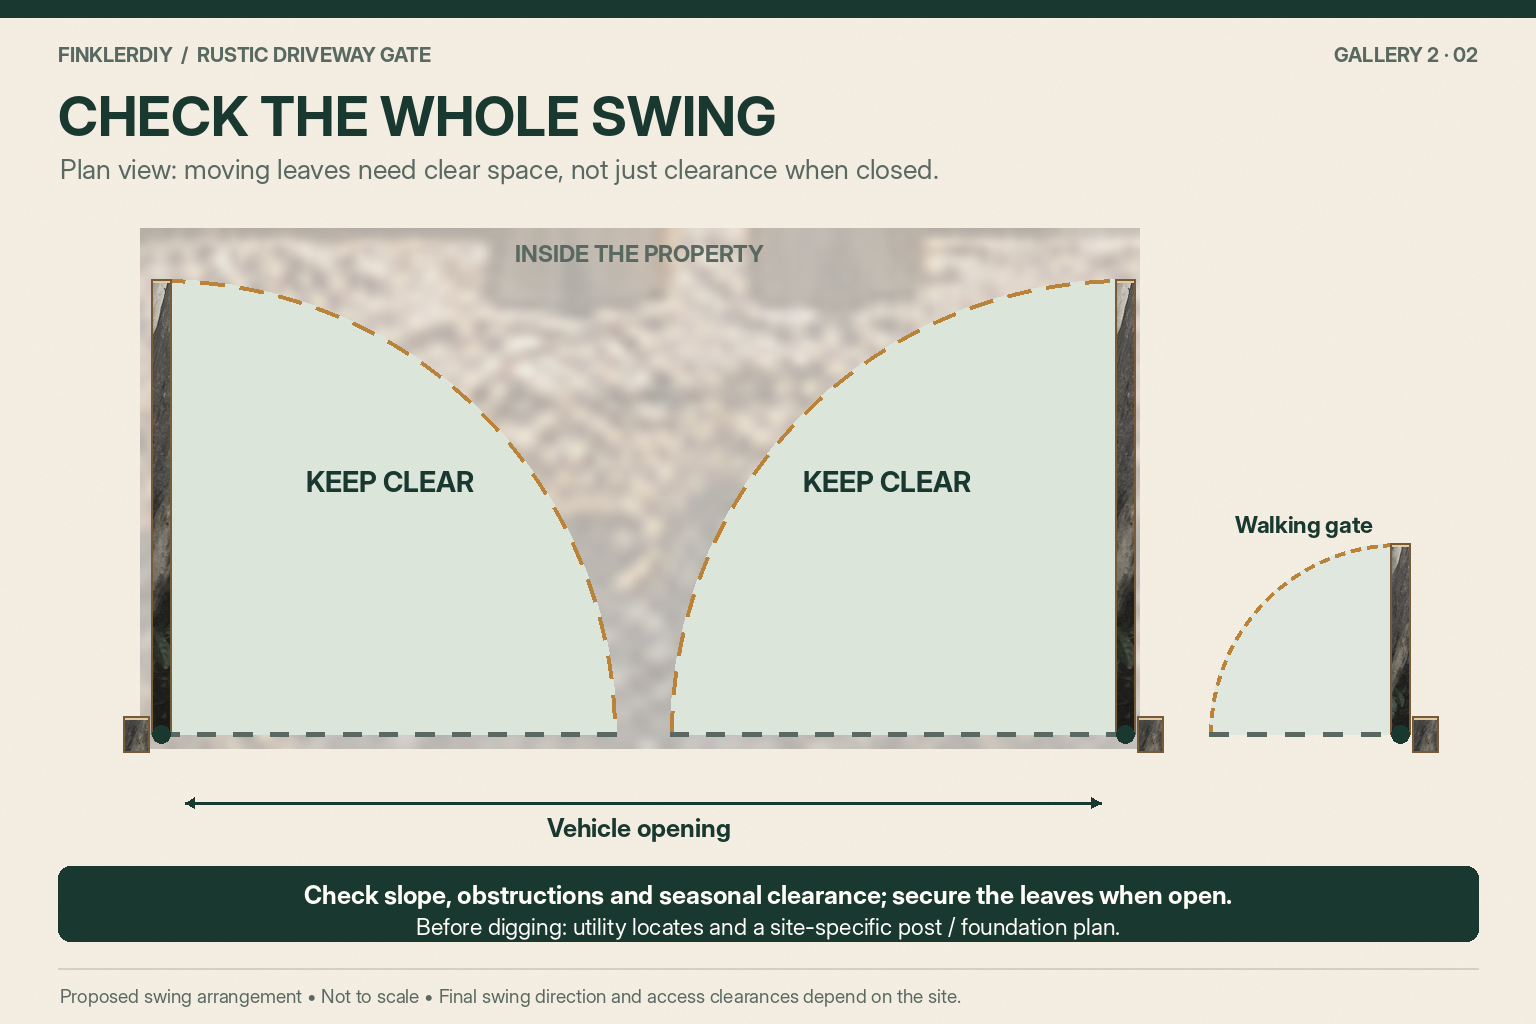
Do not assess clearance only along the closed gate line. Mark the full swing of each leaf and check the highest ground beneath that arc, including the portion beside the driveway. Where the drive rises sharply behind the entrance, changing the gate position or using a different gate arrangement may be more sensible than trying to make conventional swinging leaves climb uphill.
Arrange utility locates before excavating. In Ontario, Ontario One Call’s homeowner guidance also explains that private infrastructure, including some electrical feeds to outbuildings and septic piping, requires separate attention. Wait for the required responses and follow the excavation instructions; an apparently empty strip beside a driveway is not proof that nothing is buried there.
Step 2: Decide Where the Reclaimed Poles Belong
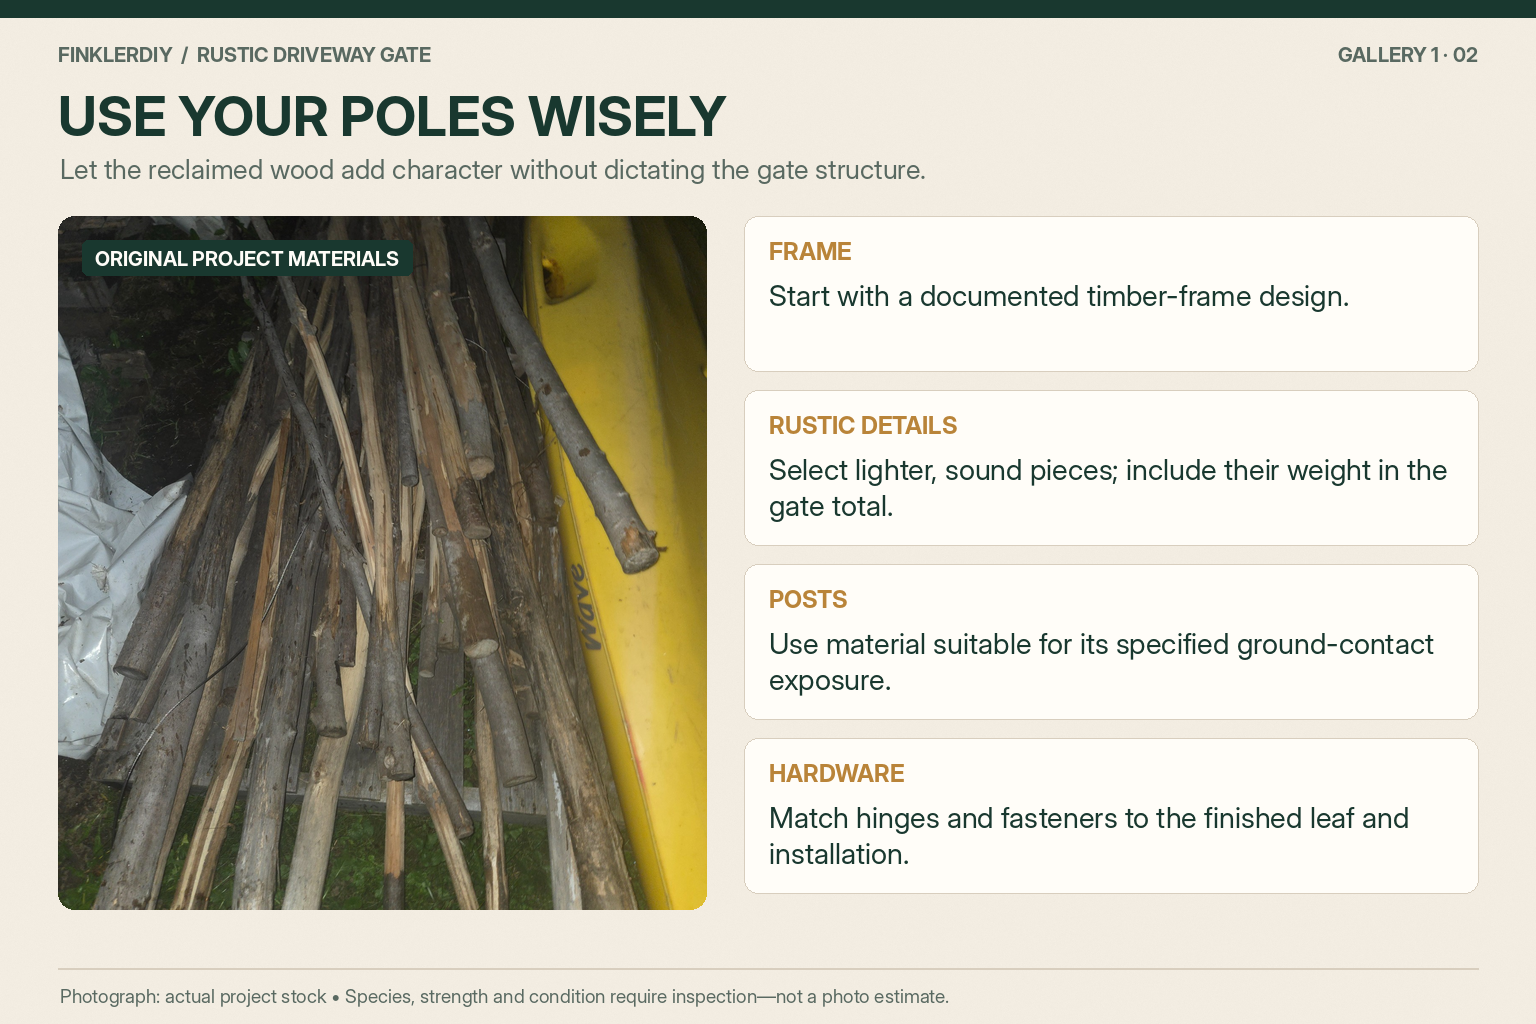
The most tempting mistake is using the largest available logs everywhere. For a moving gate, however, added material also means added weight. For equal lengths and wood density, a seven-inch-diameter cylinder contains approximately 5.4 times as much wood as a three-inch-diameter cylinder—a geometric comparison that explains why a visually impressive rail can become an unnecessarily heavy choice.
My preferred arrangement uses a predictable sawn-timber frame for each swinging leaf. Selected thin branches, carefully prepared split pieces or restrained half-round details provide the rustic appearance without replacing the structural members. The larger poles are better candidates for stationary fence rails, subject to their condition and the intended span.
Prepare the reclaimed pieces before final fitting, and inspect them again as they dry. Green wood loses moisture and changes dimensions, so tight assembly on the first day does not establish long-term stability. The USDA Forest Products Laboratory emphasizes drying, handling and moisture control as important ways to limit later dimensional problems.
Keep ground-contact suitability separate from appearance. A freshly peeled pole is not automatically an appropriate buried gatepost, and a surface finish does not establish ground-contact durability. Specify treatment appropriate to the exposure and application; the Canadian Wood Council distinguishes exterior above-ground use from wood installed in ground contact.
Step 3: Choose a Frame and Hardware System Together
Before making a cut list, select a documented gate-frame design intended for the required width. A useful starting reference is Snug Cottage Hardware’s free gate plans, which include timber rail-gate layouts, component dimensions and corresponding hardware. Use the selected plan’s actual member sizes and connections rather than combining unrelated details from attractive pictures.
The manufacturer’s Maine Board design illustrates one accessible approach: horizontal boards are incorporated into a layered frame with bolted connections and diagonal members. That is meaningfully different from screwing four pieces together at their ends. Changing the frame thickness, replacing boards with logs or adding substantial cladding changes the assembly, so those modifications need checking rather than being treated as cosmetic.
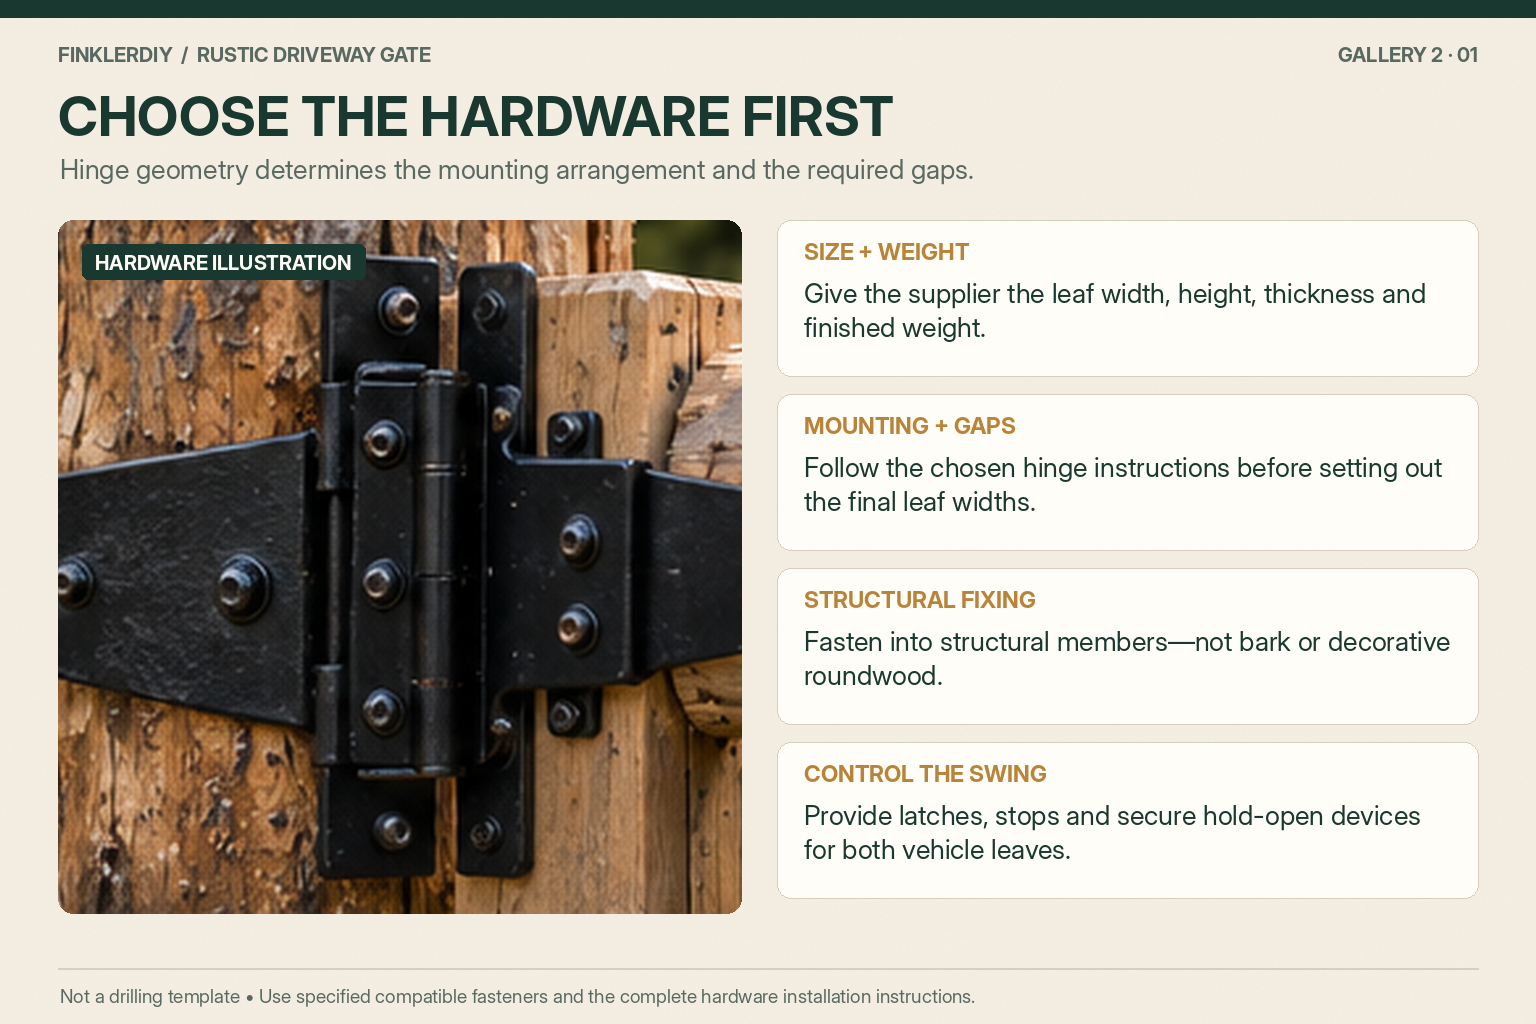
Give the hinge supplier the proposed leaf width, height, thickness, estimated finished weight and intended swing. Ask which hardware arrangement is suitable and obtain its installation instructions before fixing the post spacing. Adjustable hardware is useful, but adjustment is not a substitute for choosing the correct system initially.
Materials and Tools to Gather
Prepare a purchasing list around the chosen frame drawings rather than an assumed number of logs. Include all three gates, their supports and the matching fence sections in that list. Free timber can reduce material costs, but it does not remove the need for suitable hardware and foundations.
The main material groups are:
- Posts and foundations: supports selected for the installation, temporary bracing and the specified foundation materials.
- Gate frames: straight lumber in the actual dimensions required by the selected construction drawings.
- Reclaimed wood: sound, prepared pieces for approved gate detailing and stationary fence rails.
- Hardware: suitable hinge sets, vehicle and pedestrian latches, stops, hold-open devices and drop bolts where required.
- Connections and protection: specified bolts, washers and screws, compatible corrosion protection, and appropriate treatment for exposed cuts.
Useful tools include a tape measure, long level, square, string line, clamps, saw, drill, suitable bits and sockets. Arrange a flat assembly area and stable supports large enough for the leaves. Plan how the completed gates will be lifted before building them; holding a heavy leaf upright while someone searches for a missing bolt is not an installation method.
Step 4: Calculate the Finished Gate Widths
Do not divide five metres by two and cut two 2,500 mm gates. That would leave no allowance for the hinges or the centre meeting gap. The calculation is individual leaf width = (opening − left hinge gap − right hinge gap − centre gap) ÷ 2.
For an illustrative layout with a 5,000 mm opening, two 125 mm hinge clearances and a 25 mm centre gap, each leaf would be 2,362.5 mm wide. These are example allowances, not universal installation dimensions. Snug Cottage’s central-eye hardware instructions specify approximately 4½–5 inches between the gate and post, demonstrating how much room some hinge arrangements require.
Calculate the pedestrian leaf separately using its own hinge and latch clearances. A 1,000 mm post opening does not mean a 1,000 mm leaf, and projecting hardware can reduce the usable passage when open. Confirm that wheelbarrows, lawn equipment or mobility aids that need to pass through actually fit the completed arrangement.
Step 5: Install the Posts for the Gate Loads
Post installation is the part of this project that should not be reduced to “dig a hole and add concrete.” Have the post size, embedment, footing arrangement and any bracing checked against the gates and local ground conditions. A competent gate installer can help establish those details before excavation, particularly where the soil, slope or frost exposure is uncertain.
Set out the post positions using the selected hardware dimensions, then brace each post plumb in two directions during installation. Recheck the clear openings at more than one height rather than measuring only near the ground. Keep the supports undisturbed until the chosen foundation system is ready to carry the gates.
Gate manufacturers themselves emphasize this issue: Snug Cottage’s installation guidance identifies post movement, changing wood dimensions and frost heave as problems that affect alignment. It also discusses bracing hinge posts to adjacent fence posts where appropriate. Do not assume decorative fence rails provide that bracing unless their connections are designed to do so.
Step 6: Assemble the Vehicle-Gate Frames
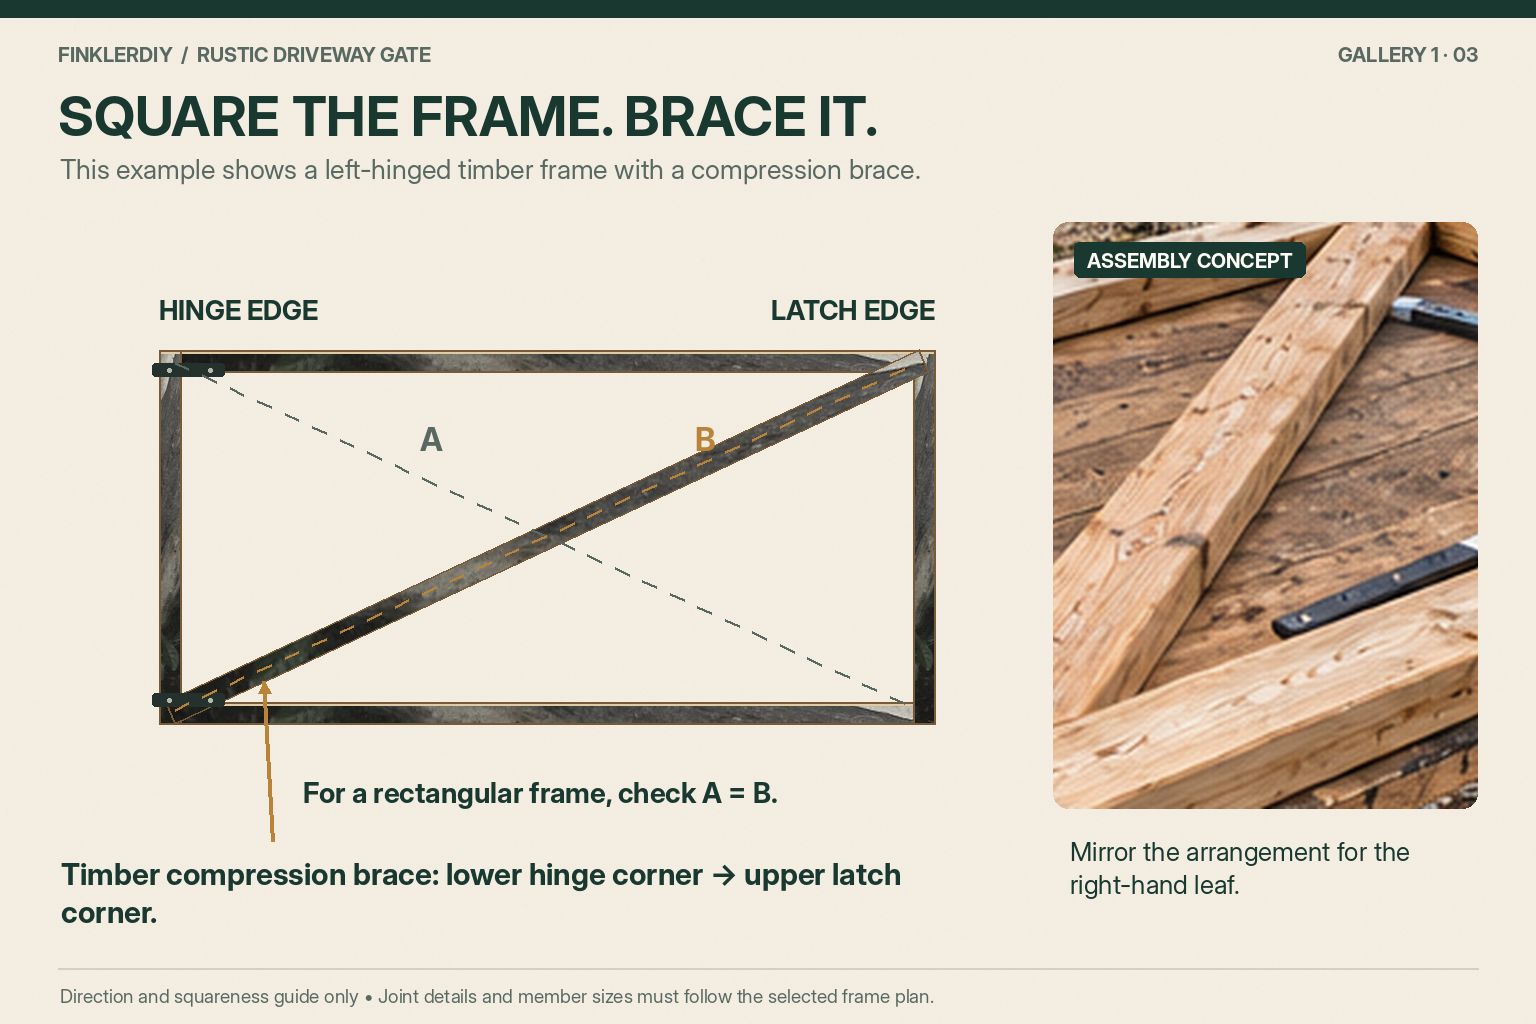
Build each leaf flat and label its hinge edge and latch edge before assembly. The two leaves are mirror images, so their bracing and hardware positions need to reflect that. Mark the overall rectangle on the assembly surface, then arrange the components according to the selected frame drawings.
For a layered, bolted timber design, establish the outer shape before permanently completing the connections. Check both diagonals between corresponding corners and adjust the rectangular assembly until they match. Keep the hinge and latch mounting locations clear of conflicting fasteners, and complete the bolted intersections specified by the plan rather than leaving temporary assembly screws to do the permanent work.
Before adding reclaimed detailing, place both frames beside one another in their closed orientation. Compare their finished height, meeting edges and rail positions. This is the easiest point to correct a mismatched component without working around hinges, latches and decorative wood.
Understand the Diagonal Bracing
For a simple rectangular gate using a timber compression brace, the supporting diagonal runs from the lower hinge area toward the upper latch area. As the latch edge tries to drop, the frame pushes against that diagonal. On a pair of oppositely hinged leaves, the compression braces therefore rise toward the centre opening, as shown in the manufacturer’s Maine Board configuration.
That does not mean every differently oriented diagonal is incorrect. A tension member works differently, and some documented gate designs use bolted members and connections intended to carry tension. Follow the complete chosen design rather than reversing a brace or replacing it with cable based only on appearance.
Step 7: Add the Rustic Wood Without Overloading the Frames
Lay out the prepared decorative pieces before attaching them, and keep them clear of the hinges, latch and ground. Aim for a balanced appearance between the two leaves rather than identical natural shapes. I would favour a few well-chosen pieces over covering every opening with heavy roundwood.
Any added detailing belongs in the finished-weight estimate given to the hardware supplier. Do not drill casually through critical frame joints or mount hinges through bark and uneven decorative layers. Keep the structural mounting surfaces accessible, and make nonstructural pieces replaceable wherever practical.
Use fasteners and connectors compatible with the wood treatment and exposure. Simpson Strong-Tie notes that preservative-treated wood requires appropriate corrosion-resistant hardware, and that galvanized and stainless components should not simply be mixed at their connections. “Exterior screw” is not enough information by itself; follow the timber and hardware manufacturers’ specifications.
Step 8: Build the Separate Pedestrian Gate
Build the pedestrian gate as its own smaller framed assembly, using a design and hardware suitable for its dimensions. Carry over the larger gates’ visual language through similar rail heights, finish and restrained reclaimed details. Keeping it visually related does not require making it equally thick or heavy.
In the proposed three-post arrangement, hinge this gate from the outermost post and latch it against the middle post. Check its swing against the right-hand vehicle leaf, the fence and the walking route before drilling. Choose a latch that can be operated conveniently from the required sides, and provide a stop so the latch is not the only thing limiting closing movement.
Treat the usable pedestrian passage as a functional measurement, not just a label on the drawing. Test the opening with the equipment and people it needs to accommodate. Do not add a raised timber threshold merely to make the entrance look framed if it creates an unnecessary obstacle.
Step 9: Build the Matching Fence Sections
The stationary fencing is where the larger reclaimed poles can make the strongest visual contribution without adding weight to the moving gates. Set out independent line posts, then divide the available distance into sensible bays using the inspected rails. Avoid assuming every pole should span its full ten-foot length simply because that much material is available.
Choose a documented post-and-rail connection appropriate to the wood, such as a supported rail-end connection or a properly designed housed joint. Keep joint locations away from damaged ends and do not cut deep notches into gateposts without checking their effect. Where possible, place the more easily replaced reclaimed pieces above ground and reserve verified ground-contact material for buried supports.
An open rustic fence defines an entrance, but it is not automatically suitable for containing every animal. Plan any mesh and gap requirements around the intended use before completing the gates. This project is not a pool-barrier design or a vehicle-impact barrier, and those functions require different specifications.
Step 10: Hang, Align and Secure the Gates
Install the hinge hardware using the prescribed fasteners, spacing and mounting arrangement. Support the gate leaf at its intended height with stable blocking or suitable lifting equipment while the hardware is connected. Keep hands and feet out of pinch points, and do not remove the temporary support until the leaf is securely retained.
Hang the second leaf, then check the centre gap, top alignment and clearance through both complete swing arcs. Make adjustments in small increments, following the hardware instructions. Hardware with lateral adjustment can help achieve alignment, but a leaning post or distorted frame needs its underlying problem corrected rather than hidden through extreme adjustment.
Decide which vehicle leaf normally opens first and arrange the centre latch accordingly. Install appropriate stops and secure hold-open devices for both leaves; drop bolts and receivers may form part of that system. Keep receivers and stops out of hazardous positions for tyres, pedestrians and snow-clearing equipment, and do not rely on loose rocks to restrain an open gate.
Final Checks and Seasonal Maintenance
Before considering the entrance finished, open and close all three gates repeatedly. Check that nothing binds, drags or requires lifting to engage the latch. Then examine the hardware and surrounding clearances from both sides, including places where hands could become trapped.
A useful final inspection includes:
- Both vehicle leaves open far enough to provide the required passage.
- The pedestrian gate operates without colliding with another moving section.
- Hinges are secured against unintended disengagement as specified.
- Latches, stops and hold-open devices work without forcing the frames.
- No projecting bolts, sharp wood or exposed wire ends threaten people passing.
- All supports remain stable during normal operation.
Revisit the installation after it has experienced changing weather and use. Inspect wood movement, loosening connections, corrosion and deteriorating reclaimed pieces, and maintain finishes according to their instructions. The need for inspection is not a defect unique to rustic construction; wood changes with moisture, and outdoor hardware also needs attention.
Is Building a Rustic Driveway Gate Worth It?
This project makes the most sense when the natural appearance matters to you and you are willing to plan the structural work properly. Reclaimed poles can give an entrance character that ordinary manufactured fencing does not offer. They should reduce waste and contribute to the design, not dictate questionable joints or excessive gate weight.
Budget for posts, foundations, hardware and help with lifting before deciding that the project will be inexpensive because the wood is free. A practical compromise is to build the timber assemblies yourself while having the post installation and hardware selection checked professionally. That keeps much of the satisfying DIY work in your hands without making the most consequential decisions by guesswork.
The finished entrance should feel straightforward to use: two balanced gates for vehicles, one convenient gate for walking and matching fencing that ties the installation together. Its success is not measured by how massive the logs look in a photograph. It is measured by whether the gates swing, latch and stay serviceable while giving the property the rustic entrance you wanted.