Introduction: A Simple Project That Actually Gets Used
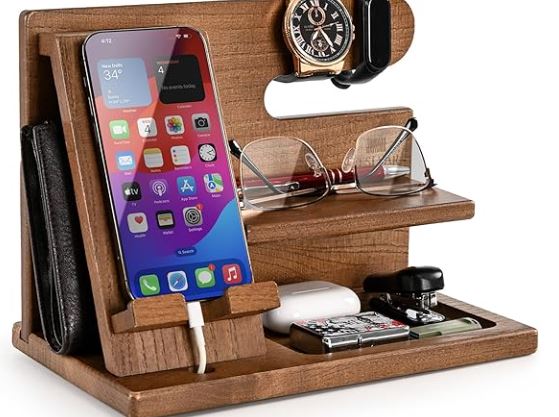
Some DIY projects look cool but end up collecting dust. A bedside stand organizer is the opposite. It’s one of those rare builds that immediately earns its place in your daily routine.
Your phone goes there. Your watch goes there. Your wallet, glasses, earbuds, keys — all in one spot. No digging around in the morning, no clutter on the nightstand, no stress.
This guide is written for real beginners. If you can measure, cut straight lines, apply wood glue, and use a brad nailer, you can build this. No curves. No complex joinery. No router work. Every piece is square, and every step is simple.
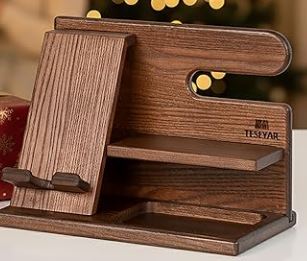
What You’ll Be Building (Simple Design Overview)
This bedside stand organizer is made of flat wooden panels assembled into a compact vertical organizer.
It includes:
- A flat base for everyday items
- A vertical back panel for structure
- A small shelf for glasses or accessories
- A phone stand with a charging gap
- A simple top bar for hanging a watch
The entire build focuses on function first, with clean lines and a modern, minimal look.
Tools You’ll Need (Basic Setup Only)
You don’t need a full workshop for this build.
- Miter saw or circular saw (straight cuts only)
- Tape measure
- Pencil
- Wood glue
- Brad nailer (18-gauge recommended)
- Clamps (helpful but optional)
- Sandpaper (120, 180, 220 grit)
- Safety glasses
That’s it. No router. No jigs. No specialty tools.
Wood Choice (Keep It Simple)
This project works with almost any wood.
Good beginner-friendly options:
- Pine (cheap and easy to cut)
- Poplar (great for staining)
- Maple or oak (more durable, higher-end look)
Thickness:
- ¾ inch (18–19 mm) is ideal
You can also use leftover scrap wood as long as it’s flat and straight.
Overall Finished Dimensions (Approximate)
These dimensions are intentionally forgiving. Small variations won’t matter.
- Width: ~10 inches
- Depth: ~7 inches
- Height: ~8 inches
This size fits comfortably on most nightstands without feeling bulky.
Cut List (All Square Cuts)
All measurements below assume ¾-inch thick wood.
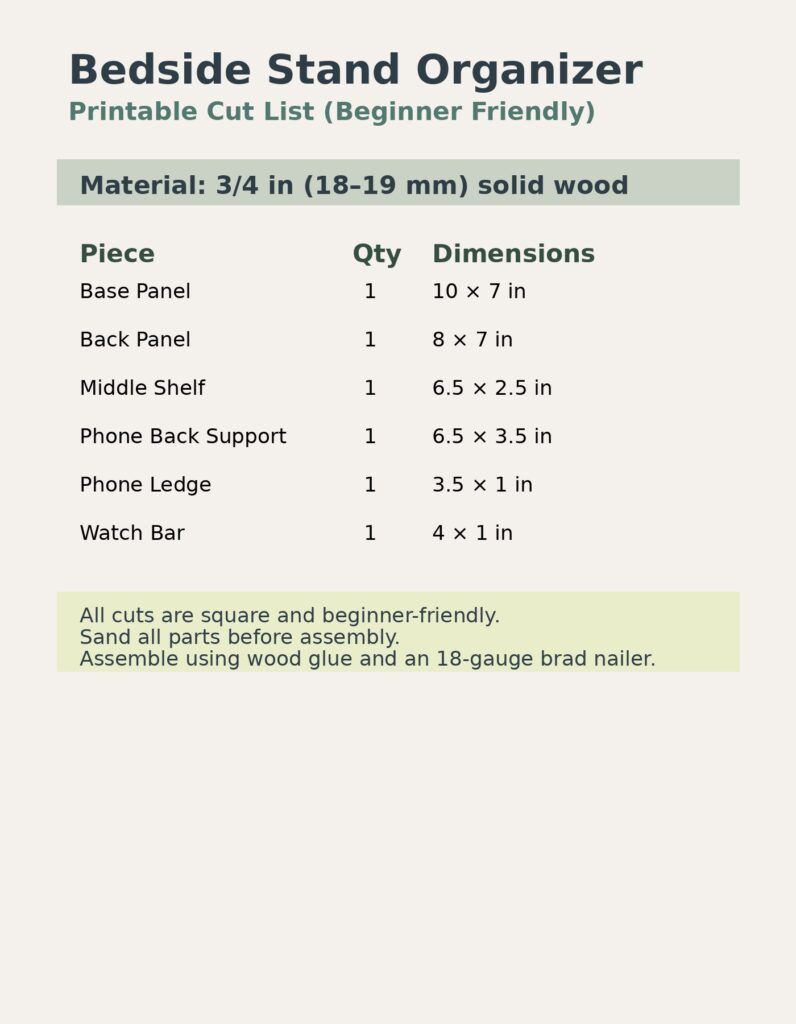
1. Base Panel (Bottom)
- Size: 10 in × 7 in
- Purpose: Holds wallet, keys, earbuds, etc.
2. Back Panel (Vertical Support)
- Size: 8 in × 7 in
- Purpose: Structural spine of the organizer
3. Middle Shelf
- Size: 6½ in × 2½ in
- Purpose: Glasses, rings, small items
4. Phone Back Support
- Size: 6½ in × 3½ in
- Purpose: Phone leans against this panel
5. Phone Ledge (Bottom Stop)
- Size: 3½ in × 1 in
- Purpose: Prevents phone from sliding down
6. Watch Bar (Top)
- Size: 4 in × 1 in
- Purpose: Hang a watch or bracelet
Step-by-Step Assembly Instructions
Step 1: Sand Before Assembly (Important)
Before assembling anything, lightly sand all pieces.
- Start with 120 grit
- Move to 180 grit
- Finish with 220 grit
This is much easier now than after everything is glued together.
Step 2: Attach the Back Panel to the Base
- Apply wood glue along the bottom edge of the back panel
- Position it flush with the back edge of the base
- Clamp if possible
- Secure with brad nails from underneath or from the back
This joint carries most of the structure, so make sure it’s square.
Step 3: Install the Middle Shelf
- Measure about 3 inches up from the base
- Apply glue to the back edge of the shelf
- Press it against the back panel
- Shoot brad nails through the back panel into the shelf
This shelf doesn’t carry much weight, so glue + brads are more than enough.
Step 4: Install the Phone Back Support
- Position it on the base, slightly angled or straight (both work)
- Apply glue to the bottom edge
- Secure from underneath with brad nails
You can keep it vertical or tilt it back slightly — either works.
Step 5: Attach the Phone Ledge
- Glue the ledge to the base, directly in front of the phone back support
- Leave a small gap behind it for a charging cable
- Secure with brad nails from underneath
This tiny piece makes a huge difference in usability.
Step 6: Add the Watch Bar
- Glue the watch bar near the top of the back panel
- Keep it level
- Secure with brad nails from the back
That’s it. The structure is now complete.
Sanding After Assembly (Do This)
Once everything is assembled:
- Lightly sand all joints
- Break sharp edges with 220 grit
- Wipe away dust with a damp cloth
This step makes a beginner project look professional.
Finishing Options (Tried and True)
Best Beginner Finish (Highly Recommended)
- Danish Oil
- Easy to apply
- Forgiving
- Enhances grain beautifully
Apply with a cloth, wipe off excess, let dry overnight.
If You Want Color
- Minwax Oil-Based Wood Stain
- Walnut
- Dark Walnut
- Early American
Apply stain, let dry fully, then seal.
Protective Top Coat (Optional but Smart)
- Satin polyurethane
- Wipe-on poly for beginners
One or two light coats is plenty.
Why This Design Works for Beginners
This project is intentionally designed to:
- Avoid complex cuts
- Avoid precision joinery
- Use fast assembly methods
- Still look clean and modern
You’re building something useful, not fighting your tools.
Final Thoughts
This bedside stand organizer is the kind of project that builds confidence. It’s small, practical, forgiving, and easy to customize. Once you build one, you’ll immediately see ways to tweak it — different sizes, different finishes, maybe even making a few as gifts.
That’s how good DIY projects work: simple enough to start, useful enough to repeat.
If you build one, you’re not just making furniture — you’re building momentum.
LEARN HOW TO BUILD A SHAVEHORSE HERE
Pingback: How to Use a Dremel on Wood (Carving, Sanding, and Design for Beginners)