
How to Replace an Interior Door: A Complete DIY Tutorial
An interior door should not need a shoulder shove, a hard slam, or a carefully timed lift of the handle to close. Yet a door that barely works can become one of those household problems you tolerate for months because replacing it sounds more complicated than it should. The project becomes much less intimidating when you break it into the right decisions: identify the problem, buy a compatible replacement, and fit the door before worrying about the finishing touches.
This guide explains how to replace an interior door, from measuring before your Home Depot trip to installing hinges, fitting the handle, and correcting stubborn alignment problems. The main walkthrough covers replacing a door slab while keeping a sound existing frame, followed by the alternative process for a prehung unit. The goal is not simply a new-looking door—it is one that swings freely, latches reliably, and does not need another adjustment every weekend.
1. Find Out Why the Old Door Will Not Close
Before buying anything, slowly open and close the existing door while watching its edges. Look for rubbing, loose hinges, and a latch that misses the metal strike plate on the frame. Gently lift the handle side while watching the hinges; visible movement can reveal loose fasteners or worn hardware. Tighten loose screws carefully by hand, but stop if they spin without gripping rather than continuing to strip the hole. The Home Depot
Next, inspect the frame with a long level and straightedge. The side jambs should be reasonably straight and plumb—meaning vertical—and the opening should not be noticeably twisted. A warped door may justify replacement, but a new slab will not straighten a badly distorted frame. Correct underlying frame or moisture problems first instead of transferring the same trouble to a new door. Sitecore
2. Choose Between a Slab Door and a Prehung Door
A slab door is the door panel without its surrounding frame. Depending on the product, it may arrive blank or already prepared for some hardware. This is usually the least disruptive replacement when the existing jambs are sound because you can leave the casing—the decorative trim around the doorway—in place. However, the new slab still needs to match the frame and hardware locations accurately. Lowe’s
A prehung door comes mounted on hinges inside a new frame. It avoids cutting new hinge recesses in a blank slab, but replacing the frame creates additional work involving trim, shims, fasteners, and possibly wall repairs. Choose this approach when the existing frame is damaged or unsuitable for reuse, not simply because “prehung” sounds effortless. Factory assembly helps, but the frame still needs careful installation in the opening. Masonite Residential
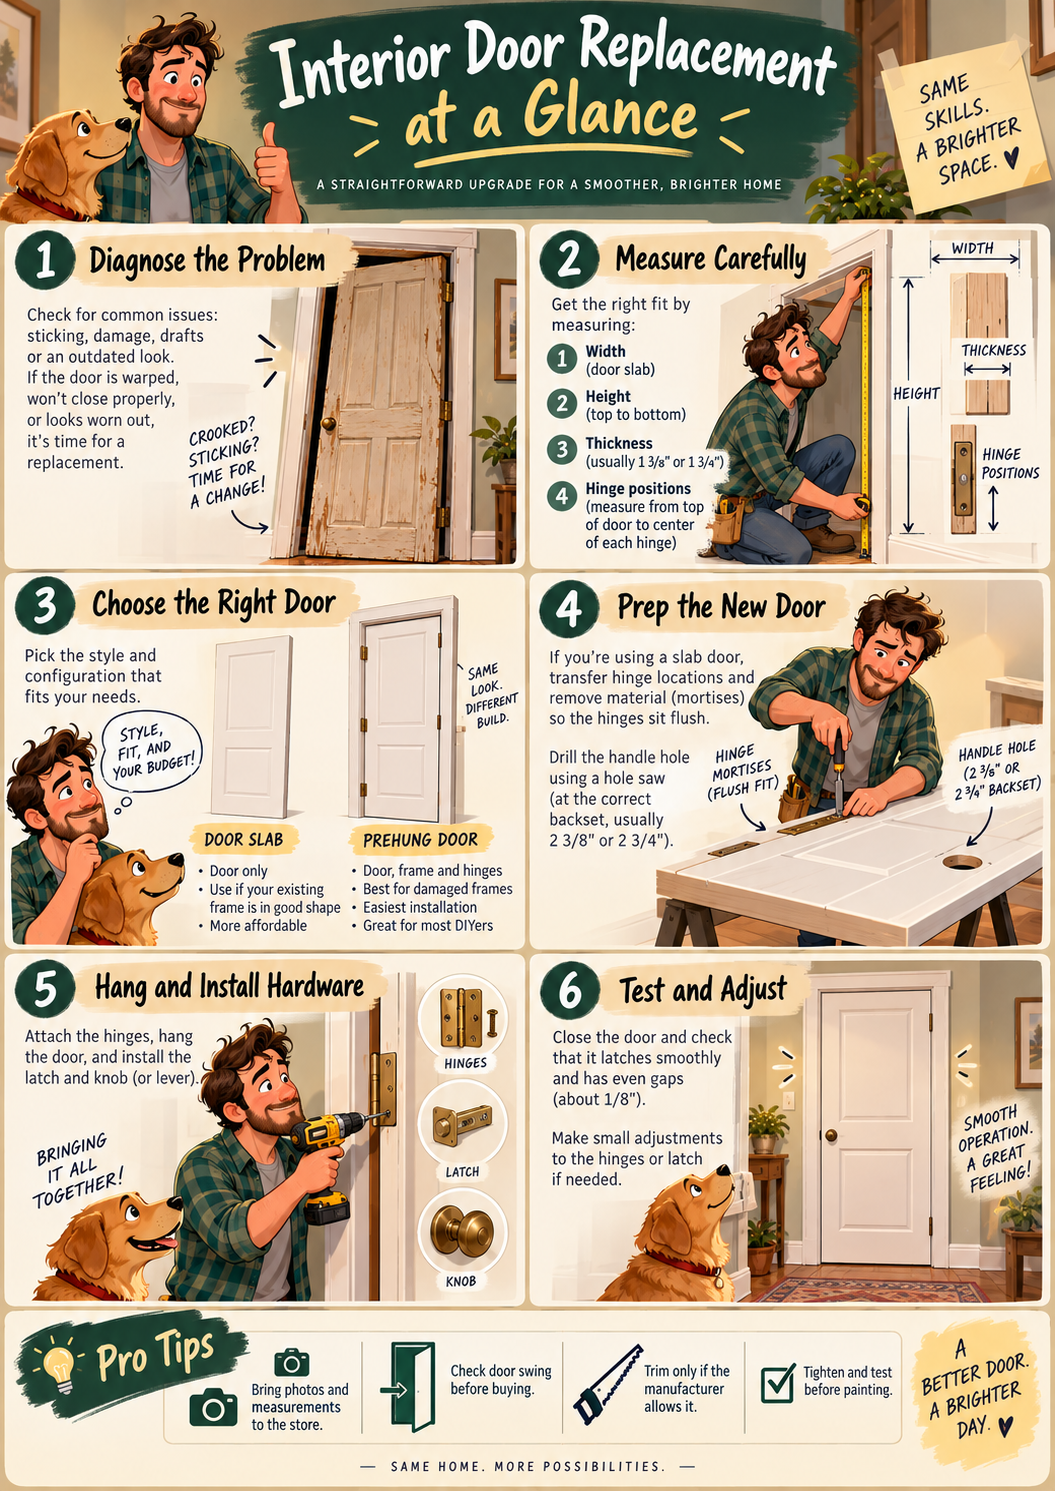
These views highlight the main choices and alignment details to check before starting. Pay particular attention to the frame, hinge positions, and space around the door.
- “Interior door replacement comparison showing a slab door beside a prehung door and frame”
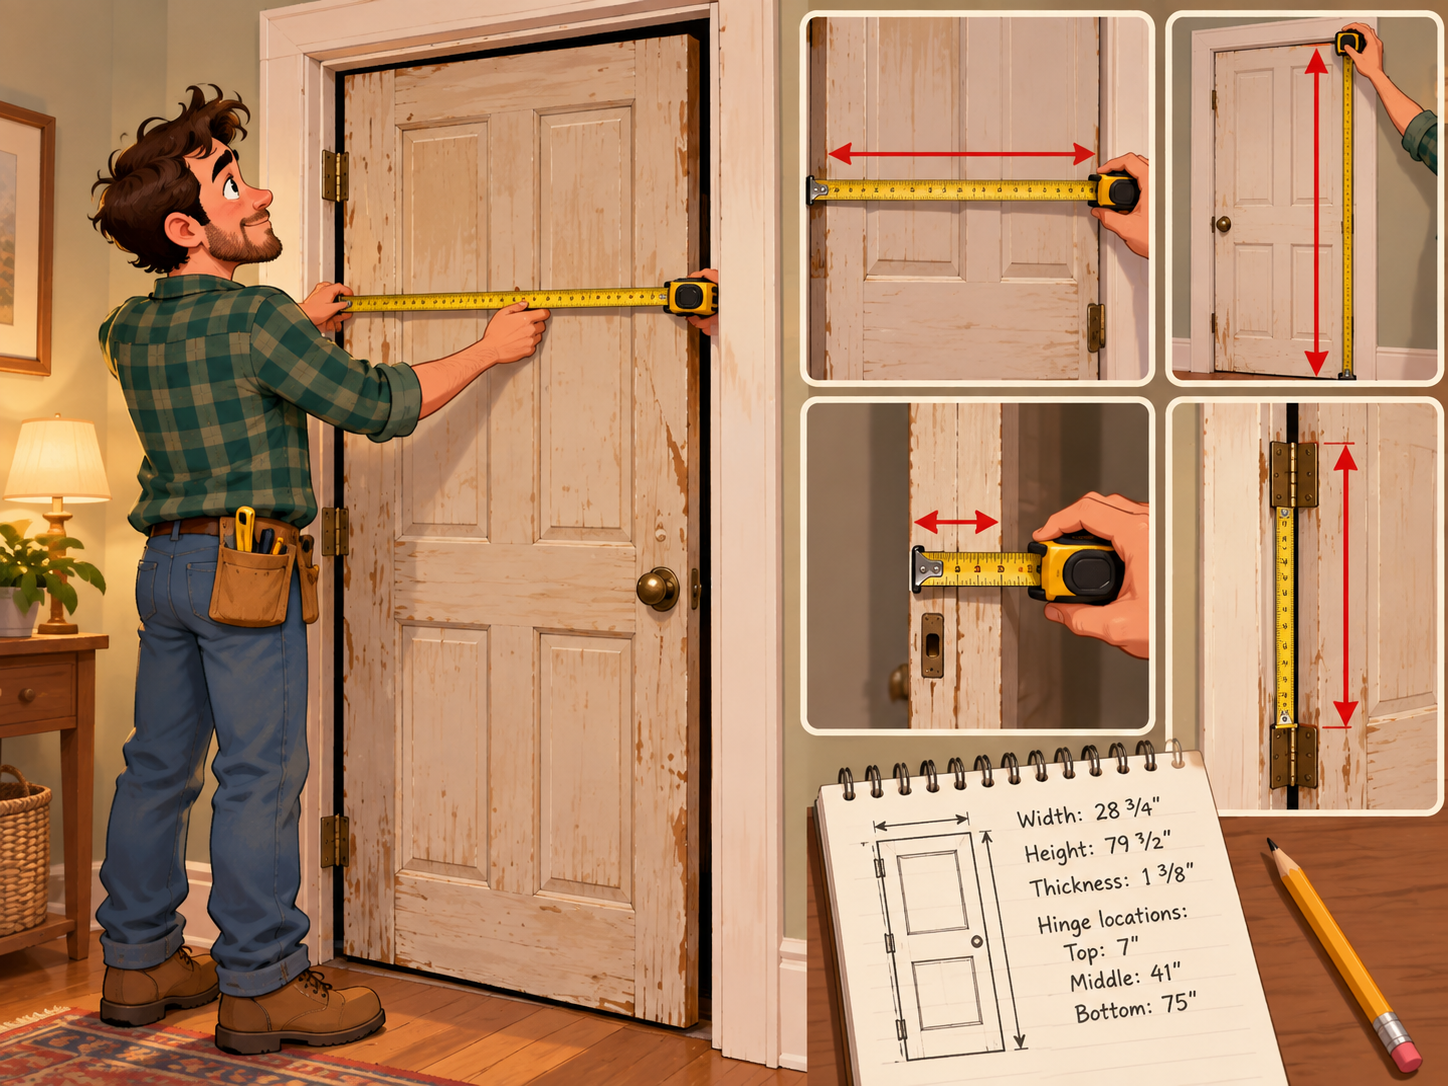
- “Measuring an interior door slab for width, height, thickness, and hinge positions”
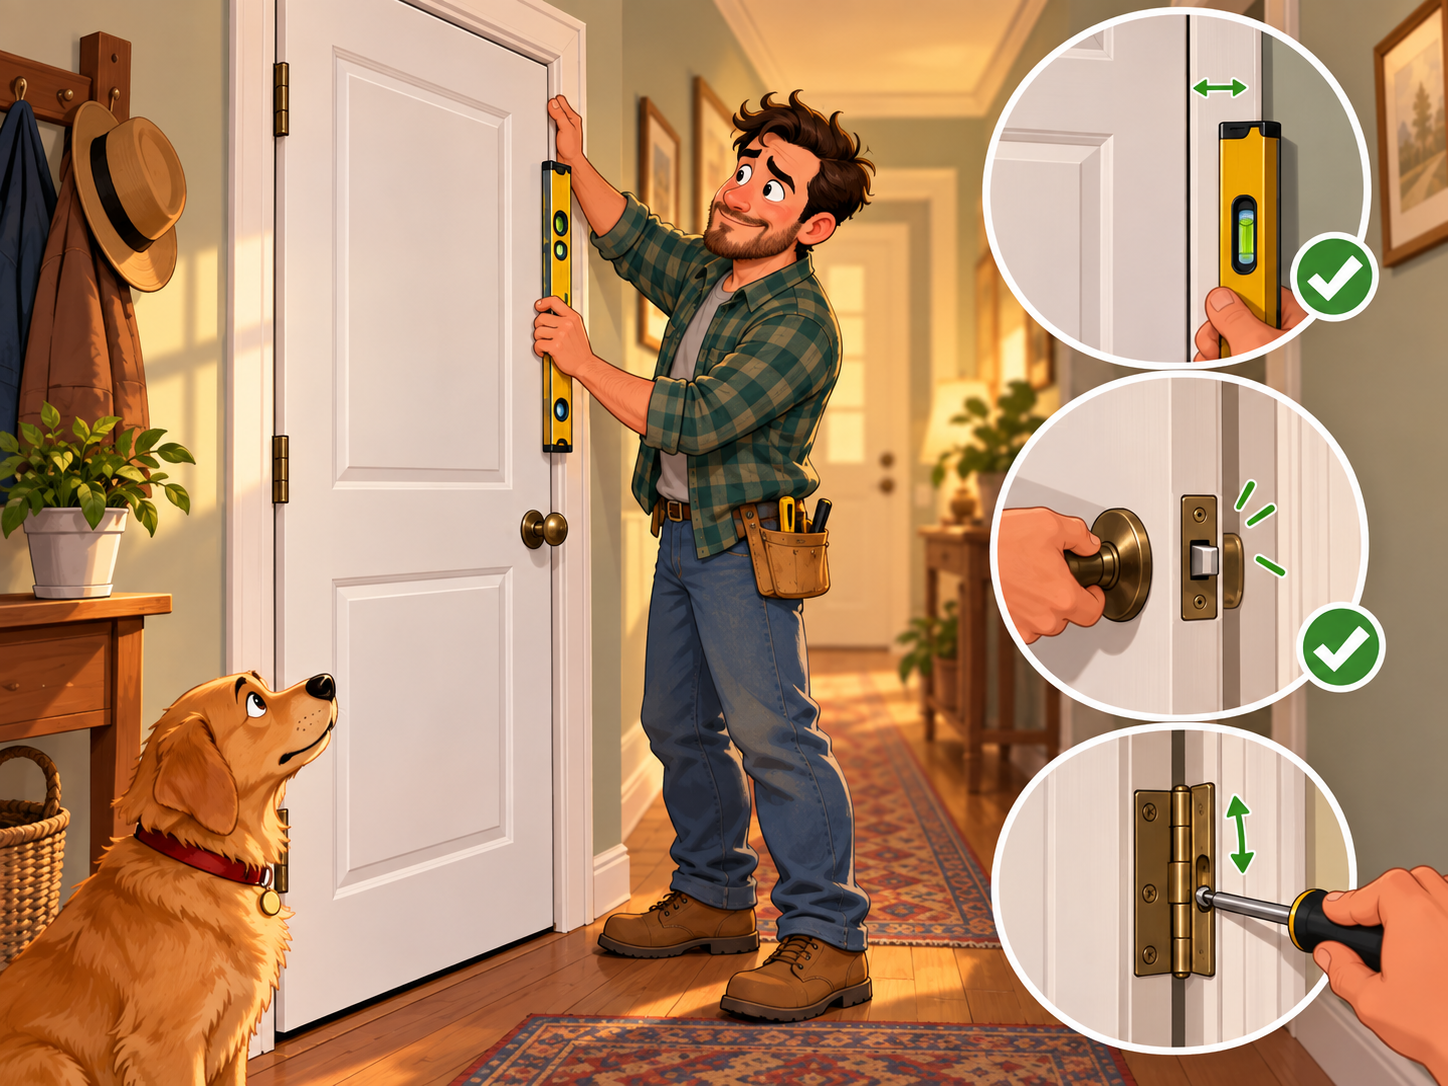
- “Interior door hinge and latch close-ups showing flush hardware and correct alignment”
3. Measure Before Going to Home Depot
For a slab replacement, measure the existing door itself rather than relying on the trim opening or a remembered size. Record dimensions accurately, keeping fractions instead of rounding everything to the nearest inch. Because your old door does not work properly, also measure the existing frame: copying a poorly fitted door exactly can reproduce its problems. Use the old slab as a reference, not unquestionable proof of the correct final size.
Bring the following information:
- Door width and height: Measure width near the top, middle, and bottom, and height along both edges. Record differences, especially where the old door has been planed or cut.
- Door thickness: Measure the actual edge thickness. The replacement must work with the existing hinges, door stop, and handle hardware.
- Hinge details: Record the distance from the door’s top edge to the top of each hinge, plus hinge dimensions, corner shape, and quantity.
- Handle position: Record the distance from the top of the door to the centre of the handle hole. Also measure the backset: the distance from the latch edge to that hole’s centre.
- Frame and swing: Measure between the jambs at several heights and photograph the door open and closed. Include a simple sketch showing which way it swings. JELD-WEN
For a prehung replacement, you also need the rough opening behind the existing frame and the finished wall thickness. Carefully removing casing may be necessary to expose the framing for accurate measurements. Match those measurements to the chosen unit’s published rough-opening and jamb-depth requirements rather than applying a universal “add two inches” formula. Lowe’s
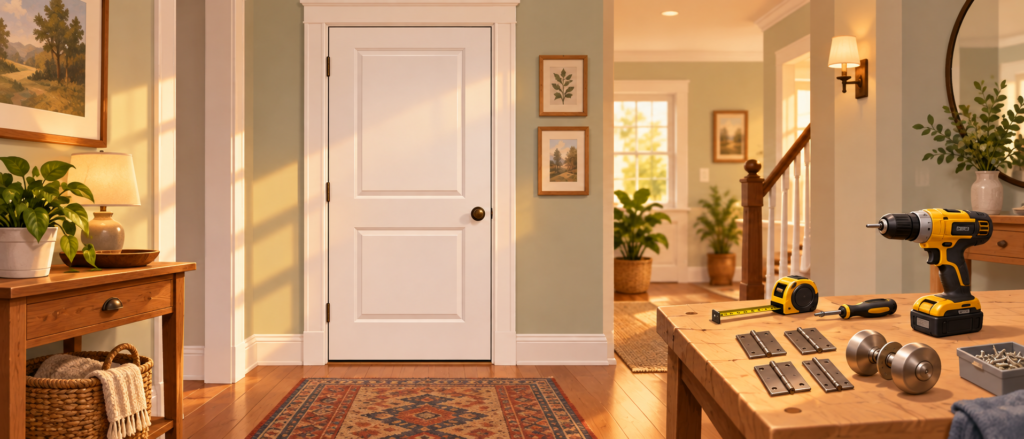
4. Buy the Right Door, Not Just the Right Style
Hollow-core doors are generally lighter and less expensive, making them practical where basic privacy matters more than noise reduction. Solid-core doors usually provide a more substantial feel and better sound control, although they should not be confused with a complete soundproofing system. For a bedroom or home office, that upgrade may be worthwhile; for a lightly used closet, it may be unnecessary. Compare construction and finish options through Home Depot Canada’s interior door buying guide. Home Depot
Inspect the exact product before purchasing, including whether the handle hole and hinge recesses are already machined. Factory preparation only helps when its positions match your existing frame. For prehung or otherwise handed products, compare your swing sketch with the manufacturer’s diagram rather than relying on a casual “left-hand” description. Also check whether hinges, handles, and casing are included instead of assuming everything shown in the display comes in the package. The Home Depot
Most importantly, read the trimming restrictions before buying a door that needs resizing. Allowances vary by construction and product, and some instructions prohibit cutting particular edges. Consult the exact manufacturer’s documentation; JELD-WEN Canada’s installation and finishing instructions are one example of the information to obtain before starting. If the required reduction exceeds the allowance, order a suitable size rather than gambling on a bigger cut. Masonite Residential
5. Gather Tools and Prepare the Work Area
Organize the project around measuring, controlled cutting, and safe support. A door is awkward to balance while someone is trying to align screws, so arrange a helper and clear enough space to work. Check the door’s acclimation instructions and allow any required time indoors before machining or finishing it. Sitecore
Your working kit will usually include:
- Measuring and marking: Tape measure, pencil, combination square, long level, straightedge, and painter’s tape. Keep your measurements and swing sketch nearby throughout the installation.
- Hardware installation: Drill, suitable pilot bits, hand screwdriver, hammer, hinge-pin punch, sharp chisel, and the correct screws. A self-centring hinge bit and door-lock drilling jig can simplify accurate positioning.
- Fitting and finishing: Stable sawhorses, clamps, protective padding, shims, sandpaper, and appropriate paint supplies. Add a guided saw or plane only when permitted trimming is necessary; a router and hinge jig are optional alternatives to hand-cut mortises. The Home Depot
Wear eye protection, use hearing and dust protection appropriate to the work, and clamp the door before cutting. In an older home, assess potentially lead-containing paint before sanding, scraping, or disturbing painted trim. Health Canada warns that renovation dust from lead-based coatings can be hazardous, so ordinary sanding is not an acceptable shortcut when lead is suspected. Canada
This tutorial concerns ordinary room-to-room doors. Fire-rated doors, apartment-entry doors, and doors between a house and garage require their applicable requirements to be checked before replacement. Do not assume a standard hollow-core slab is an acceptable substitute simply because its dimensions match. Masonite Residential
6. Remove the Old Door and Test the Replacement
Photograph the hardware and label reusable parts before dismantling anything. Support the door from below and have a helper hold it while you remove removable hinge pins, leaving the upper connection until the door is securely controlled. If the hinges do not have removable pins, support the slab and unscrew the appropriate hinge leaves instead. Keep the old door until the replacement is fully working. The Home Depot
Before cutting hinge recesses or drilling for the handle, test the new slab in the frame with a helper and suitable spacers. Check the manufacturer’s required gaps: approximately ⅛ inch at the top and latch side appears in some instructions, but hinge-side clearance can differ. Check the bottom against the finished flooring throughout the intended swing, not just at the doorway. Also preserve any required ventilation clearance rather than shrinking the under-door gap purely for appearance. Sitecore
7. Trim Only Where the Door Allows It
Do not assume every new door needs trimming. If adjustment is necessary, mark the required finished size and compare every proposed cut with the product’s allowance. A door’s rails and edges are part of its construction, not unlimited material waiting to be removed. A cut that looks minor can still exceed the permitted amount, especially near the top or on a hollow-core product. Masonite Residential
For an allowed bottom cut, clamp a straight guide securely and support the door and offcut so the saw will not bind. Use a suitable fine-tooth blade and follow the saw’s instructions for workpiece orientation and cutting technique. For a small width adjustment, a plane may offer more control, but preserve any specified latch-edge bevel. Remove material gradually, check the fit again, and plan to refinish every newly exposed edge. Home Depot Images
8. Transfer and Cut the Hinge Recesses
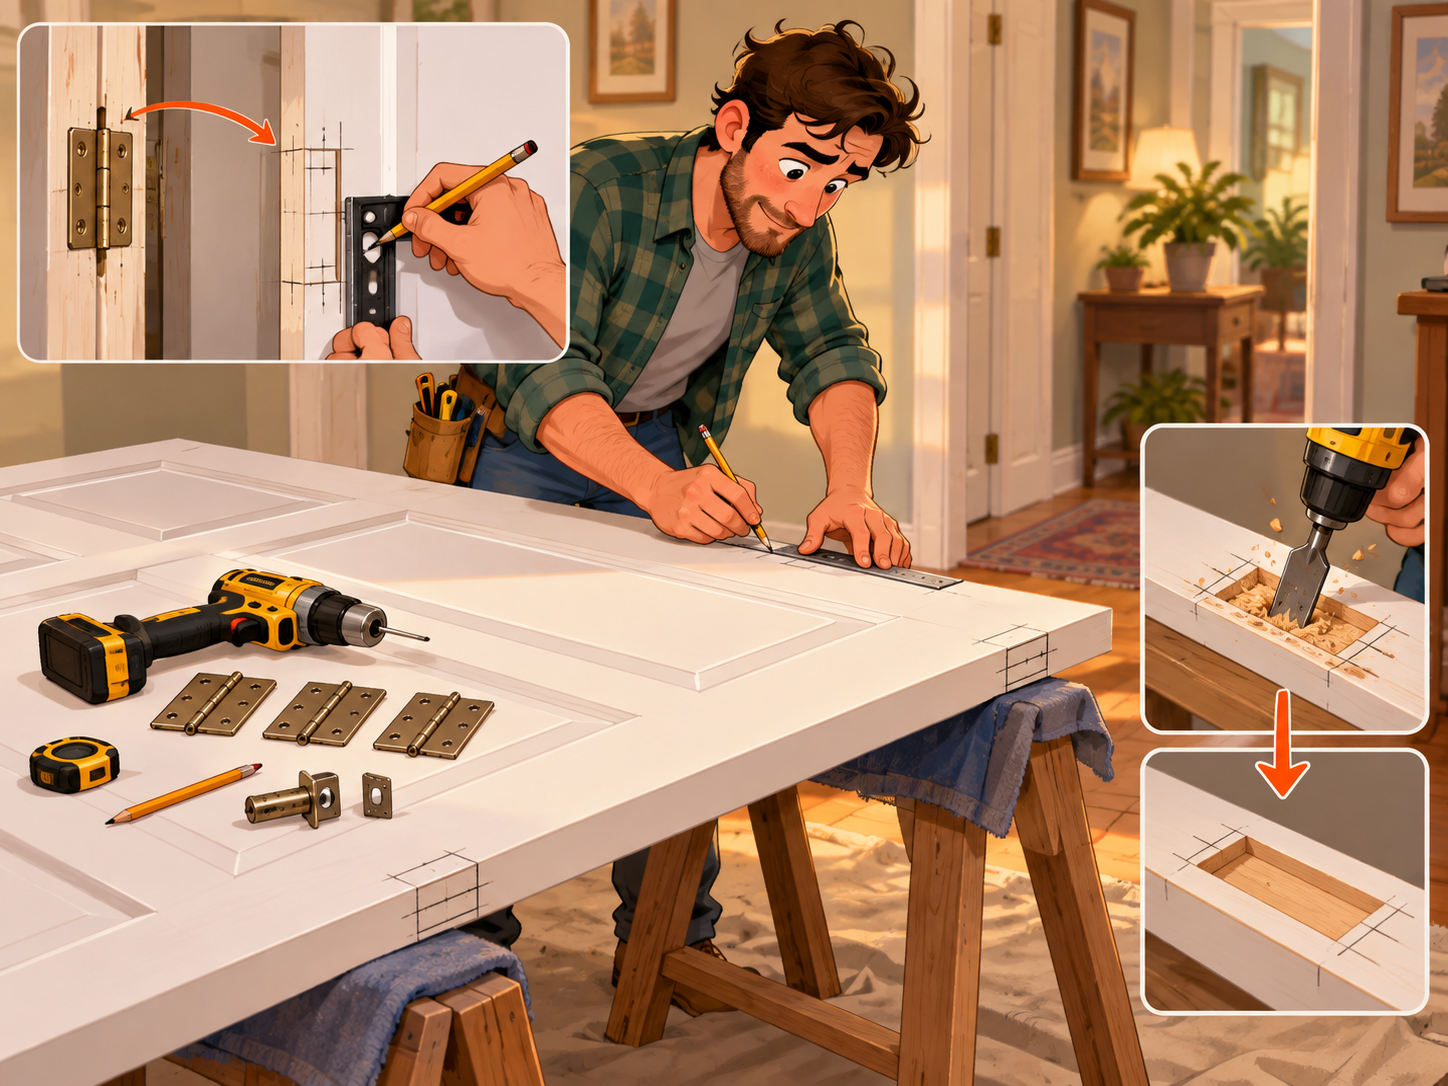
When the old door’s hinge locations are correct, align the old and new slabs at the top and transfer those positions with a square. Do not align the bottoms if their lengths differ. Alternatively, transfer the locations directly from the jamb while accounting for the required gap above the slab. For example, a hinge beginning 7 inches below the underside of the head jamb would begin 6⅞ inches below the slab’s top when the specified top gap is ⅛ inch. Home Depot Images
The shallow recess for each hinge is called a mortise. Trace the actual hinge leaf, score its outline, and remove thin layers with a sharp chisel, or use a correctly adjusted router jig. The leaf should sit flush with the surrounding edge rather than standing proud or sinking below it. Test frequently, then drill centred pilot holes and tighten the screws without stripping them. RONA
Match the hinge quantity and load capacity to the replacement door, particularly when upgrading to a heavier solid-core slab. Do not automatically reuse a lightweight door’s hinge arrangement. With a helper supporting the slab, connect the hinges and check the swing before installing the latch; use any frame-anchoring fasteners required by the manufacturer, without overtightening and pulling the jamb out of alignment. RONA
9. Drill and Install the Handle and Latch
Position the new handle to align with the existing strike after confirming the slab’s final hanging position. Follow any lock-block markings on a hollow-core door so the hardware is installed in the intended reinforced area. Use the lockset’s template rather than estimating hole sizes: common residential preparations include a 2⅛-inch face hole, a 1-inch edge hole, and a 2⅜- or 2¾-inch backset, but your hardware instructions control. The Home Depot
Secure the door and drilling guide before boring the face hole. Cut partway from one face and complete the opening from the opposite face to reduce breakout, then drill the edge hole into it. Where the latch uses a faceplate, mark and cut its recess so the plate finishes flush; a drive-in latch may use a different preparation. Install the latch with its sloping face positioned to meet the strike as the door closes, then assemble the handles according to their instructions. Lowe’s
Test the mechanism while the door remains open. Both handles should retract the latch freely, and the latch should return fully when released. Only then close the door gently and check engagement, testing any privacy lock and its emergency release before considering the hardware complete. Schlage
10. Fix Alignment Problems Before Reaching for the Saw
If the door still misbehaves, identify exactly where resistance occurs before changing anything. Check hinge seating, screw heads, frame alignment, and latch contact in that order. Make one adjustment at a time so you can tell what actually helped.
- The upper latch-side corner rubs: Inspect the upper hinge and its fasteners before trimming the slab. Loose hardware can allow the door to sag, making a hinge problem look like an oversized-door problem. The Home Depot
- The hinge edge binds: Check for hinge leaves or screw heads standing above the surrounding surface. Correct the seating and verify the specified clearance instead of immediately shaving the opposite edge. RONA
- The latch misses the strike: Put a little chalk on the latch to reveal its contact point. Once the door hangs correctly, reposition the strike and adjust its recess or receiving pocket as necessary. RONA
- The door contacts the stop unevenly: Check for a twisted jamb or warped slab before moving trim. On a sound frame with separately attached stop moulding, its position can be adjusted to suit the correctly hanging door rather than forcing the door against it. Sitecore
11. Installing a Prehung Door Instead
For a prehung replacement, score the paint and caulk joints around the casing before carefully removing it. Support and remove the old slab, then release the old jambs from the rough opening without damaging the structural framing. Do not cut blindly around concealed wiring or plumbing, and arrange appropriate help where the opening needs repair. Confirm the opening dimensions and finished-floor height before positioning the replacement. The Home Depot
Set the new unit in the opening with a helper and establish the hinge jamb first. Check it for plumb in both directions, using shims between the jamb and framing at the locations specified by the manufacturer. Keep the jamb aligned with the intended finished wall surface and secure it with the prescribed fasteners through the supported locations. Recheck alignment as you fasten; pulling an unsupported jamb toward the framing can distort it. Masonite Residential
Adjust the latch jamb and head jamb until the frame is square, untwisted, and properly spaced around the slab. Open and close the door repeatedly before completing the fastening schedule or reinstalling casing. Trim protruding shims, install the casing without disturbing the frame, and complete the hardware and finishing work. The practical rule is simple: get the door operating correctly before covering the installation with trim. Sitecore
12. Finish the Door and Perform the Final Checks
Once fitting and machining are complete, finish the door according to its instructions. For products requiring all six surfaces to be sealed, that means both faces, both long edges, the top, and the bottom—not merely the visible panels. Protect hardware from paint buildup, use compatible coatings, and follow the coating manufacturer’s drying and return-to-service guidance. Closing a freshly painted door too soon can make it stick to the stop and damage the finish. The Home Depot
After reinstalling or uncovering the hardware, check the full swing again and confirm that the door clears the floor. It should latch with normal hand pressure rather than requiring a slam, lift, or shove. Check both handles, any privacy function, and the final gaps before putting the tools away. Keep the product label and installation instructions with your household records so future adjustments start with the correct specifications. Lowe’s
Final Verdict: A Good Installation Starts Before the First Cut
Replacing an interior door is manageable, but “buy the same size and screw it on” leaves out the details that determine whether the result actually works. The best approach is to diagnose the original problem, choose the right replacement format, and verify fit before making irreversible cuts. When you work in that order, the project becomes a series of controlled adjustments rather than a frustrating guessing game. The reward is wonderfully ordinary: a door you can close without thinking about it.