
How to Repair Roof Shingles: Replace a Damaged Asphalt Shingle Step by Step
A damaged roof shingle is easy to ignore when you are standing in the yard. Maybe it is one cracked tab, a corner missing after a windstorm, or a shingle that has lifted and never settled back into place. But shingles are part of a layered water-shedding system. When one piece is torn, missing, or no longer sealed properly, rain and wind-driven water have a better path toward the underlayment and roof deck below.
The good news is that a small, isolated problem does not automatically mean you need a new roof. On a roof that is otherwise in good condition, replacing one damaged asphalt shingle can be a sensible repair. The job is not about smearing on a pile of roofing cement and hoping for the best. A durable repair means carefully releasing the overlapping shingles, removing the nails that hold the damaged piece in place, installing a proper match, and resealing the tabs you disturbed.
This guide explains how to repair roof shingles by replacing a cracked, torn, curled, or missing asphalt shingle. It applies to standard asphalt-shingle roofs only. Metal roofs, cedar shakes, slate, flat roofing, valleys, skylights, chimneys, and widespread storm damage are different jobs and often need a qualified roofer.
First, Decide Whether a Single-Shingle Repair Makes Sense
Start from the ground and from inside the house before deciding to climb onto the roof. Look for a missing tab, a torn corner, a crack running through a shingle, a lifted edge, or shingles that have blown off after wind. In the attic, look for fresh stains, damp insulation, drips, musty odours, daylight, or darkened plywood. A ceiling stain does not always sit directly below the leak because water can travel along framing before it becomes visible indoors.
A one- or two-shingle repair makes the most sense when the rest of the roof looks healthy. The surrounding shingles should still lie flat, retain most of their protective granules, and feel reasonably flexible rather than dry and brittle. A repair is also more straightforward when the damage is away from a valley, chimney, skylight, vent, wall intersection, or other flashing detail. Those locations are more likely to involve a leak source beyond the visible shingle.
Call a roofer when damage is widespread or the roof surface feels unsafe. Multiple missing shingles, curling across several slopes, soft decking, sagging areas, exposed underlayment, heavy granule loss, or recurring water stains are signs that replacing one shingle may only hide a larger problem. The same goes for a roof that is steep, high, wet, icy, or damaged after a serious storm. A roof repair is never worth a fall.
Tools and Materials You Will Need
For a basic asphalt-shingle replacement, gather a matching replacement shingle, a flat pry bar, hammer, compatible roofing nails, utility knife, gloves, eye protection, and an approved asphalt plastic roof cement. A leftover shingle bundle from the original installation is ideal because the size, profile, and colour will match the existing roof.
Avoid makeshift materials. Do not use drywall screws, staples, household caulk, expanding foam, or an open flame. They are shortcuts, not reliable roofing repairs. If you cannot get an exact shingle match, bring a loose piece or clear photo to a roofing supplier and match the manufacturer, product line, profile, and colour as closely as possible.
Safety Comes Before the Repair
Roof work is not a casual DIY job. Only work on a dry roof in calm daylight. Do not climb onto a roof that is wet from rain, heavy dew, frost, snow, or algae. Avoid steep slopes, high roof edges, and any area that feels soft, spongy, or visibly sagged.
A homeowner who is not fully confident working at height should stop at the inspection stage and hire the repair out. Take ground-level and attic photos instead of taking unnecessary risks. For professional work, use the required training, equipment, and site-specific safety procedures for the area where you work.
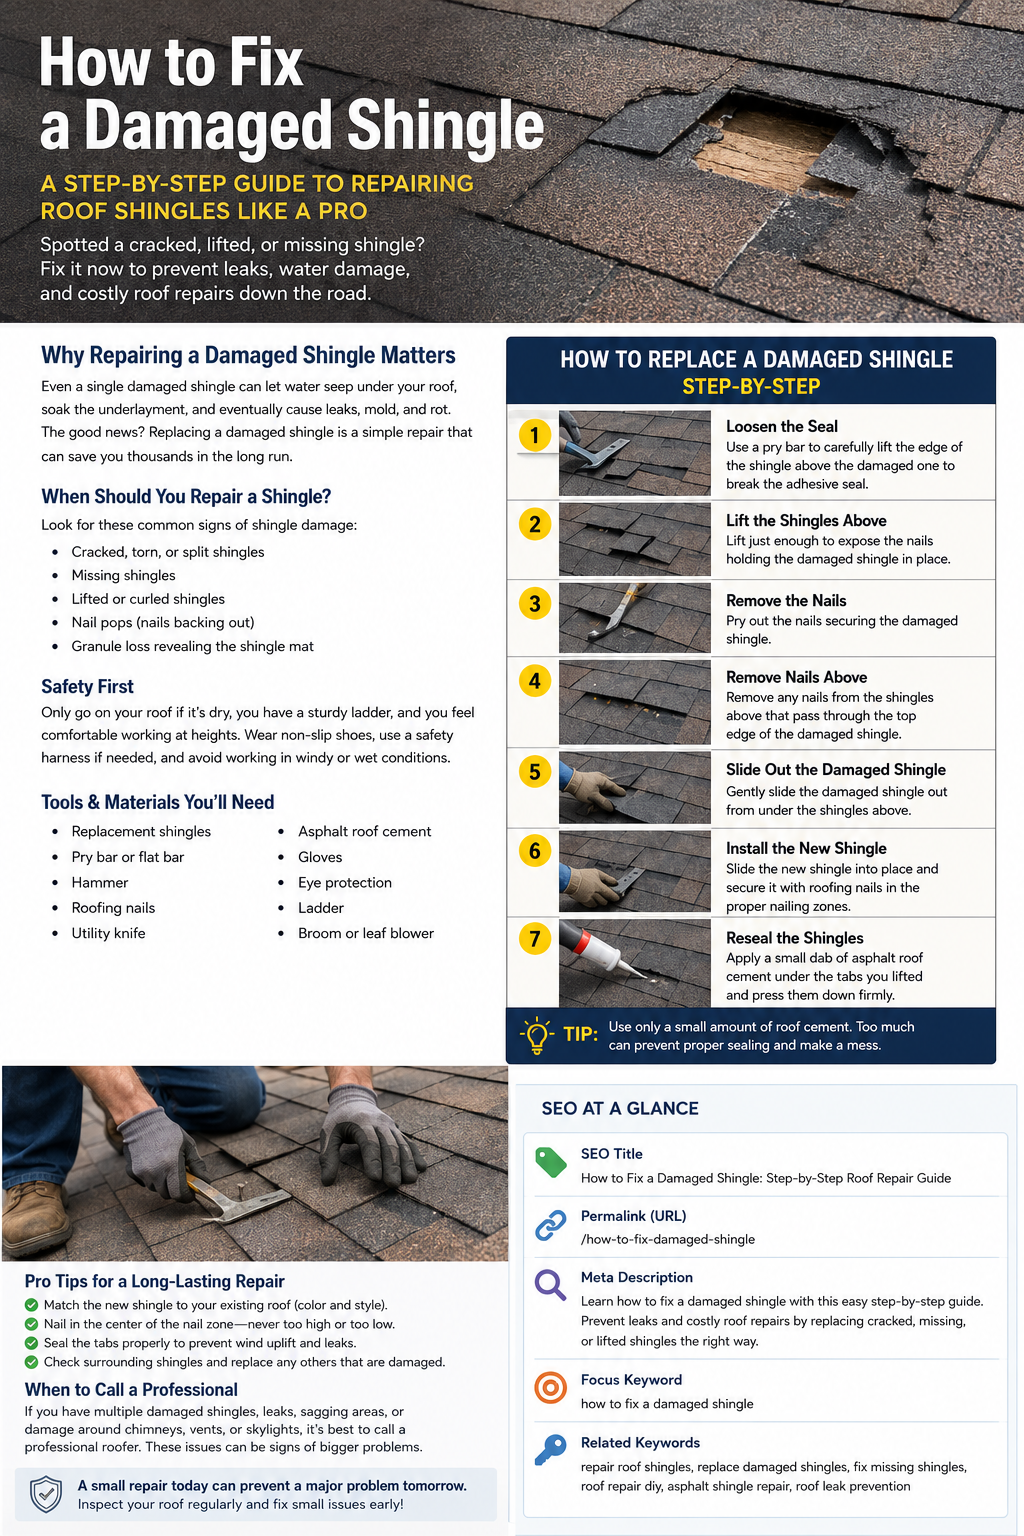
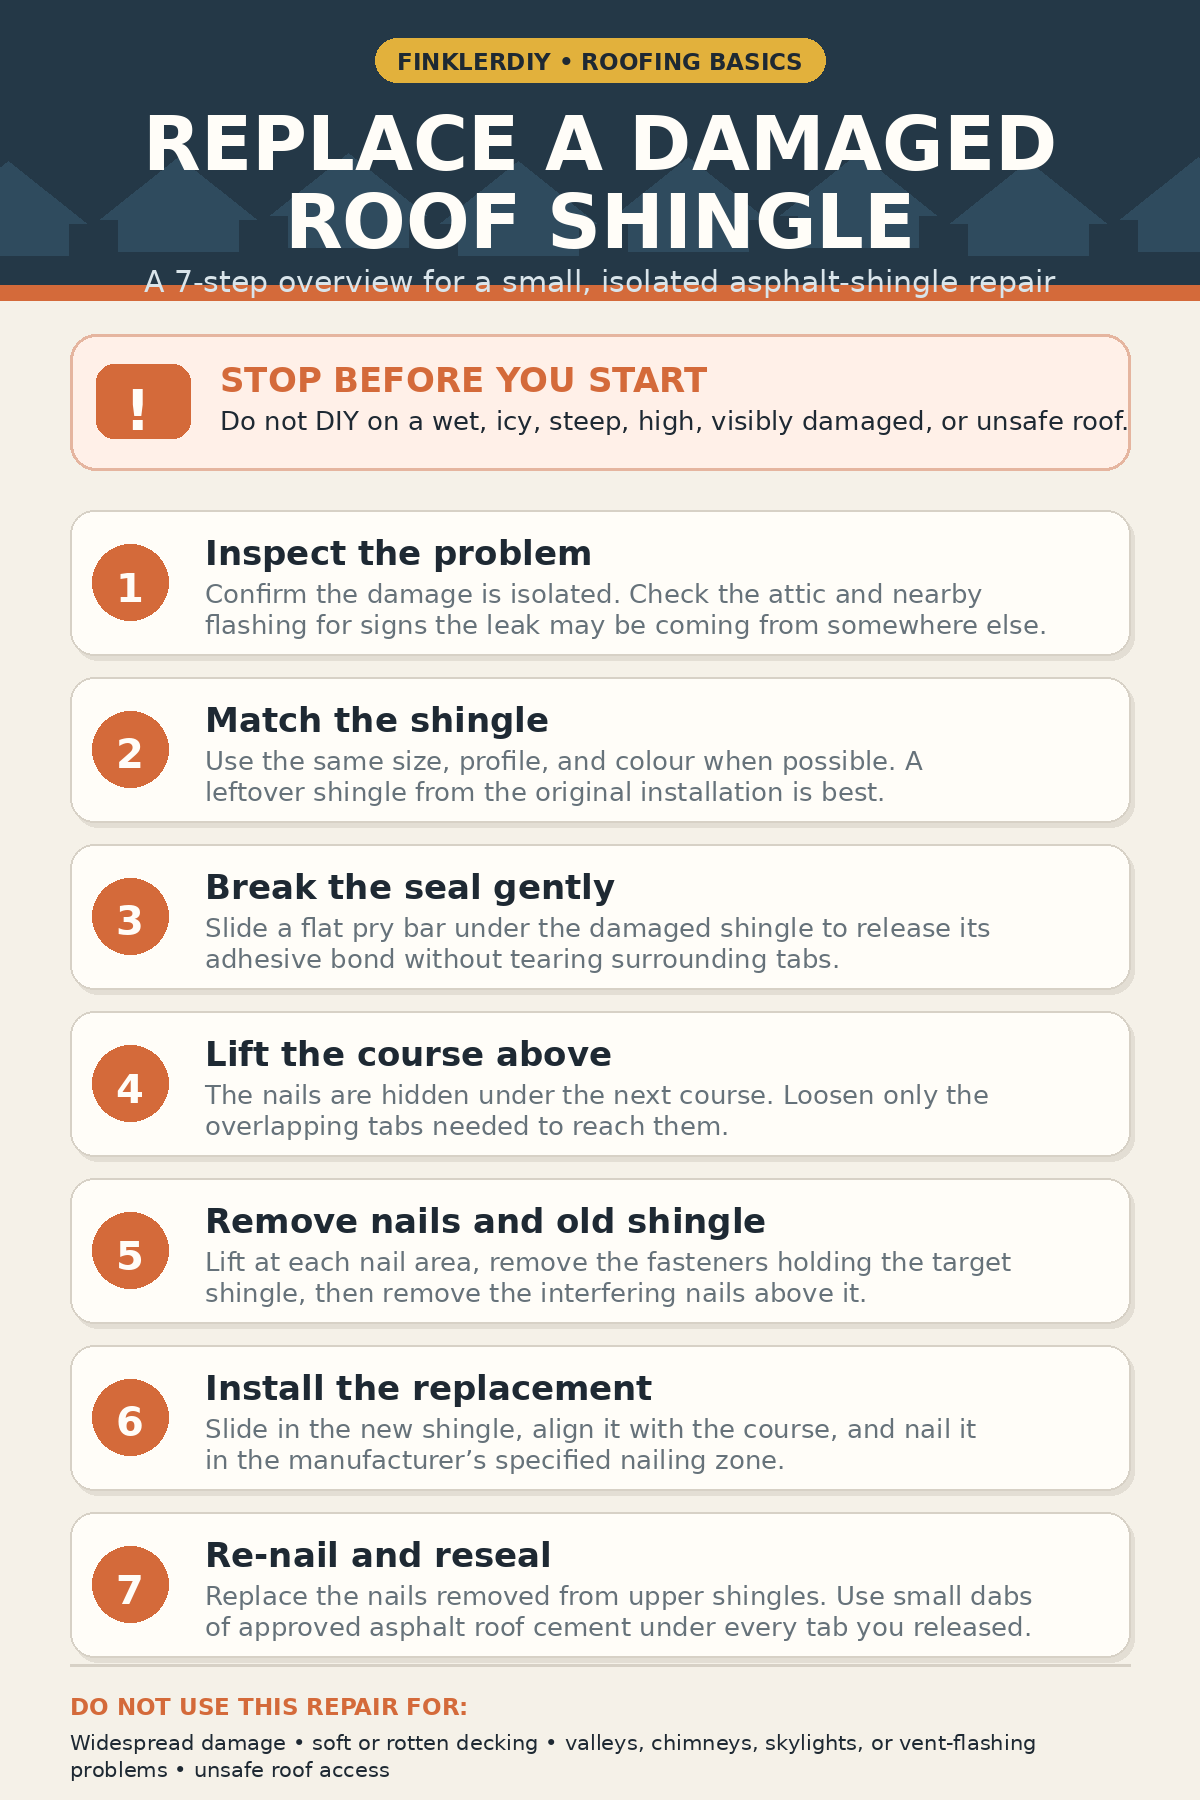
How to Replace a Damaged Roof Shingle
1. Inspect the Repair Area
Once you are safely positioned, look at more than the damaged shingle. Check the shingles immediately above it, the course below it, and the nearby nails. A shingle may look like it is held by one row of nails, but its upper edge is also trapped beneath the nails of the course above. That overlapping pattern helps the roof shed water and resist wind, but it means the surrounding layers must be handled carefully.
Before removing anything, compare the replacement shingle with the old one. Confirm that its width, cutouts or profile, and exposed height will line up. If you are dealing with architectural shingles, do not assume every laminated shingle is interchangeable. Different brands and product lines can have different patterns and widths.
2. Break the Seal on the Damaged Shingle
Asphalt shingles seal to the course below through factory adhesive strips or sealant spots. Slide a flat pry bar carefully under the lower edge of the damaged shingle and work it sideways a little at a time. Your goal is to release the bond without tearing the surrounding shingles or scraping away their granules.
Take your time here. In warm weather, the adhesive can be sticky and stubborn. In cold weather, the shingles themselves can become stiff and easier to crack. Do not force a shingle to bend farther than it wants to. A patient repair is better than turning one damaged shingle into three.
3. Release the Shingles Above It
The nails holding the damaged shingle are usually covered by the shingle course above. Carefully release the adhesive bond on the overlying shingle or shingles so you can lift them enough to reach the fasteners. Because shingle courses are staggered, you may need to loosen more than one nearby tab to access everything without creasing the material.
Lift only as much as necessary. A flat bar should be used with control, not like a crowbar that bends the roof system out of shape. If the surrounding shingles are already brittle, cracked, or heavily worn, that is a warning that the job may be turning into a broader repair.
4. Remove the Nails Holding the Damaged Shingle
With the damaged shingle exposed, work the pry bar beneath each nail location. Lift the shingle and nail together rather than digging aggressively from above. This helps protect the surface of the shingles that will remain on the roof. Remove all the fasteners holding the damaged shingle.
After the first row of nails is out, the shingle may still refuse to slide free. That does not mean it is glued in place. Its upper edge is likely still being held by nails from the shingle course immediately above. This is a normal part of the roof layout, not a reason to start cutting or ripping.
5. Remove the Interfering Nails and Slide Out the Old Shingle
Lift the shingles above just enough to find the nails that pass through the upper edge of the damaged shingle. Remove only the nails necessary to release that shingle. Once the fasteners are out, pull the damaged shingle straight down and out of the course.
With the old piece removed, inspect what is underneath. The underlayment should not be torn or missing, and the roof deck should not feel soft or look blackened, swollen, or rotten. If you find damaged plywood, wet insulation, or obvious rot, stop there. Replacing the visible shingle alone will not solve the actual problem.
6. Install the Replacement Shingle Correctly
Slide the replacement shingle into the open space until it sits exactly where the old shingle did. Its bottom edge should line up with the rest of the course, and its side joints should follow the existing pattern. Take a moment to look down the roof before nailing anything. A shingle that is slightly crooked can create an obvious line from the ground and interfere with proper water shedding.
Use roofing nails that match the manufacturer’s requirements for the shingle system. Nail placement is not a detail to guess at. Every shingle has a designated nailing zone, and the required nail count can vary by product and wind rating. Follow the instructions printed on the shingle wrapper or supplied by the manufacturer.
Drive nails straight and flush with the surface: not proud, not angled, and not sunk deep enough to cut through the shingle. Once the replacement is fastened, reinstall the nails you removed from the overlying shingles. Any old nail holes that will remain exposed after the repair should be sealed as directed by the product instructions.
7. Reseal the Tabs You Released
The final step is the one people often skip. You broke the factory seal on the damaged shingle and on the shingles above it, so those tabs need to be secured again. Apply only small, controlled dabs of approved asphalt plastic roof cement beneath each disturbed tab, then press the shingle back into place.
Do not coat the entire shingle edge or squeeze out a huge bead of cement. Excess material can run, stain the roof, trap debris, and look like a patch from the street. The goal is a small adhesive bond, not a thick layer of tar. Once the repair is complete, step back and confirm the shingles lie flat with no lifted corners, exposed nails, or blocked drainage paths.
What About a Lifted Shingle That Is Not Cracked?
A lifted shingle does not always need replacement. If the shingle is still flexible, intact, and sitting in the correct position, it may only need to be resealed. Carefully clear away loose debris, apply a small amount of compatible asphalt roof cement beneath the unsealed tab, and press it down.
Replace it instead when the tab is torn, creased, cracked, curled, missing granules in a damaged area, or no longer lies flat after being pressed down. Roofing cement can help secure a healthy shingle. It cannot turn a brittle, broken, or worn-out shingle back into a reliable water-shedding surface.
Common Shingle Repair Mistakes to Avoid
The biggest mistake is treating every roof problem as a shingle problem. Water often enters around flashing, pipe boots, valleys, roof-to-wall joints, skylights, chimneys, or nail penetrations. Replacing a visibly damaged shingle may improve the roof, but it will not fix failed flashing or a split pipe boot nearby.
Another mistake is using the wrong replacement shingle. A piece with the wrong size, thickness, or profile can leave joints exposed or prevent the courses from lying flat. Avoid the temptation to cover the area with a loose scrap, a tarp held by nails, or a heavy layer of cement. Those are temporary emergency measures at best and can make the permanent repair harder later.
Finally, do not pressure-wash asphalt shingles or scrape aggressively at their surface while working nearby. The granules are part of the shingle’s protective surface. Treat them like roofing material, not dirt that needs to be blasted off.
When to Call a Roofer Instead
Hire a qualified roofer when you have more than a small, isolated repair, when the roof is difficult to access safely, or when you see evidence that water has reached the layers below the shingles. A professional should also inspect damage near chimneys, skylights, valleys, sidewalls, low-slope transitions, and vents.
A roofer is also the right call after hail, a fallen tree limb, or a major windstorm. Take clear photos from the ground, save any shingles that fell into the yard, and document ceiling or attic damage before making a permanent repair. That record can help when you speak with an insurer or contractor.
Frequently Asked Questions
Can I repair a cracked roof shingle without replacing it?
For a true crack, tear, missing corner, or damaged section, replacement is usually the better repair. Sealant may temporarily cover a small defect, but it does not restore the strength or water-shedding performance of a broken shingle. Resealing is better reserved for an intact shingle that has simply lifted.
Can I replace one roof shingle by myself?
It is possible on a low, dry, accessible roof when the damage is isolated and the person doing the work understands the repair. But roofs are high-risk work areas. If the slope, height, weather, roof condition, or access feels questionable, hire a roofer. A one-shingle repair is never worth an injury.
Why is my roof leaking even though the shingle looks fine?
The leak may be coming from flashing, a vent pipe boot, a valley, an exposed nail, damaged underlayment, or a problem higher up the roof. Water can travel before it shows inside, so the stain on the ceiling is not always directly below the entry point.
Can I repair roof shingles in cold weather?
Cold conditions can make shingles stiff and more likely to crack, and factory seal strips may not activate on their own. Do not work on snow, frost, ice, or a damp roof. Follow the shingle manufacturer’s instructions, protect the materials from extreme cold, and use approved hand-sealing methods when required.
Further Reading
How to Replace Missing Shingles — IKO
This is the best direct companion link because it walks readers through the physical replacement sequence: breaking seals, lifting overlapping shingles, removing nails, sliding in the replacement, and resealing tabs.
Roof Repair vs. Replacement: How to Tell the Difference — Owens Corning
This is useful for readers who discover that their “one damaged shingle” may actually be part of a larger roof problem. It supports your section about when a small repair is reasonable versus when they should get a roofer to assess the roof.